
I read A LOT of “how to” guides on the net and watched other optimization videos on YouTube prior to creating this one. And what bothers me is all of them only gives you the ‘what to do’ of things.
“Don’t know what settings to toggle?” “Here they are!” “Are you in need of fps?” “These are the best settings!”
I think it’s not enough to simply tell others what settings they need to toggle on or off; but it is more important to help users understand WHY these graphics options matter both visually and resource-wise. And just like the old cliché, it is truly better to teach people how to fish than give them one.
This guide is intended for people using mid-range GPUs, specifically AMD, that doesn’t have DLSS. But this guide can also be enjoyed by other low-end and high-end users from either camp, provided RTX-specific effects are out of the equation. In here, we will be finding the perfect balance between consistent, playable performance at 60 plus fps, and perceivable quality. The reason I say perceivable is because we tend to attach quality to the text that describes a specific setting: like “very high” or “ultra”. But we should be focusing on how the game looks according to our naked eye, not according to how the menu says it looks.
More importantly, this guide will help you explain WHY these graphics options matter and which of these should you focus on more than others. Because I know you’re not just toggling graphics settings simply to get good-looking visuals and for arbitrary frame-rate numbers to go up; you also want peace of mind. You struggle with fiddling around with the graphics options, playing a bit of the game, and still having that gnawing itch at the back of your mind, doubting whether or not you’ve made the “best” settings combinations for the “best” immersive experience. You’re desperate to settle this introspective tug-of-war once and for all so you can finally move on and actually play the game.
I am that person. And this is exactly why I made this guide.
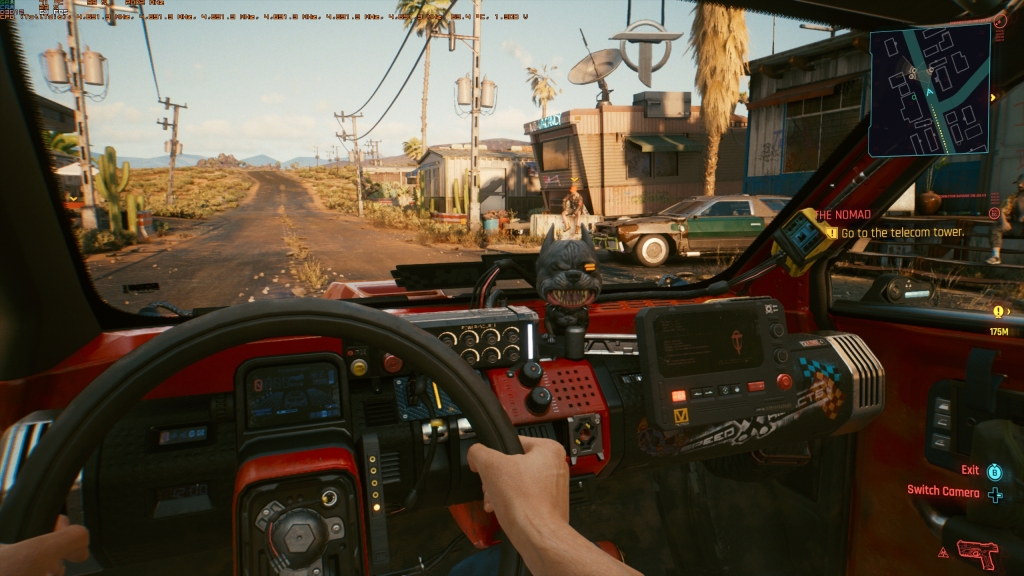
For context, here is my current hardware:
- GPU: Sapphire 5700xt nitro plus
- CPU: 5600x Ryzen CPU
- RAM: Crucial Ballistix 3600mhz CL16 of RAM.
- SSD: Adata XPG SX8200 Pro 1TB
A lot of you may be wondering, this is ONLY mid-range? Well I am basing my definition of mid-range on my GPU. The 5700XT nowadays is nowhere near the top of the card hierarchy compared to last year. And ultimately, it’s the GPU that determines the overall mileage of your game performance.
This was recorded using AMD’s Radeon Software. And because I’m AMD, there will be no RTX settings to be discussed. Currently, the game is patched to 1.04.
Before going into our benchmarks, it is important to distinguish what constitutes normal gameplay from specific scripted events. Focusing too much on on-rail sections for their low performance numbers may just be a futile effort since these moments are one-time events that are rarely repeatable in regular gameplay. Lastly, graphics settings do not impact all scenes with the same level of intensity. Some settings are greatly significant indoors, some during outdoors, and some during close-up conversations.
If you like a supplemental video and see the same optimization guide in action form, the settings video guide is right here: https://www.youtube.com/watch?v=Vtl73Gv-5IQ&t=32s (a like and subscribe won’t hurt at all)
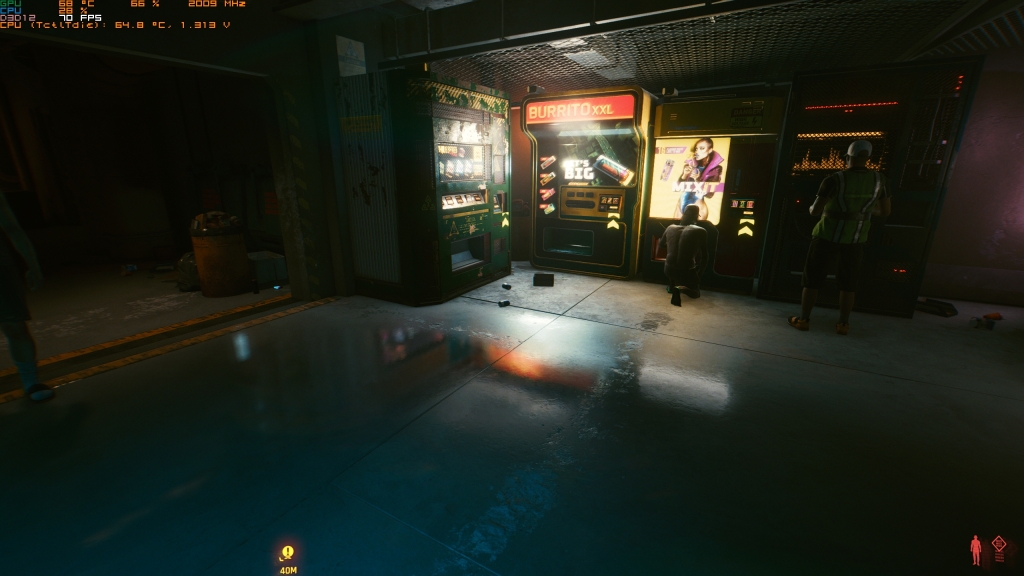
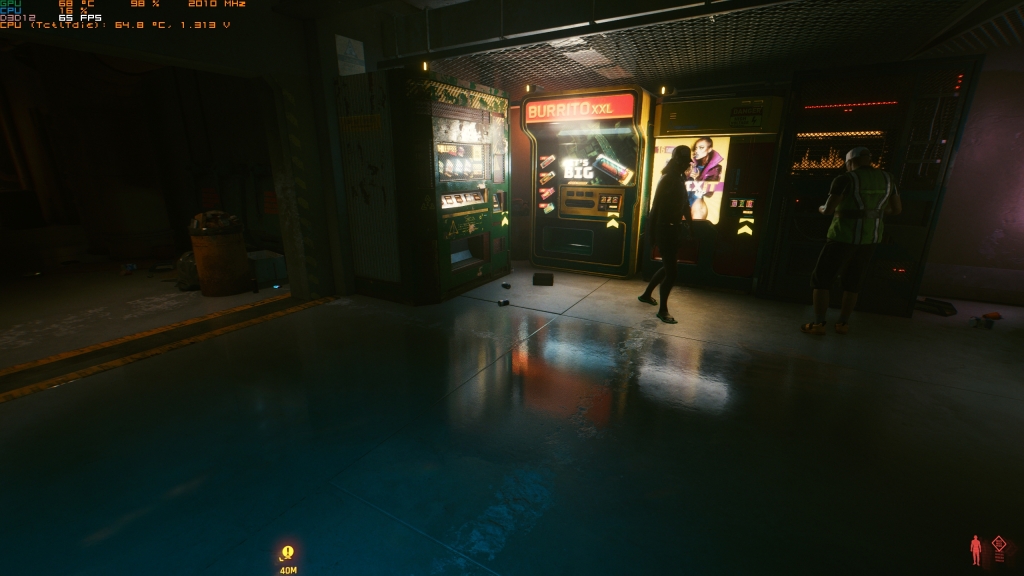
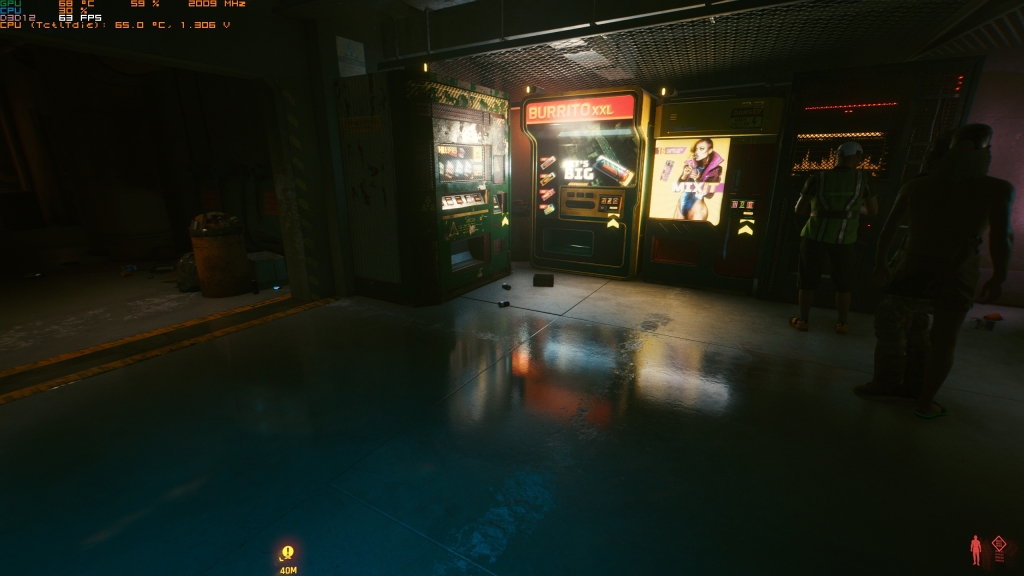
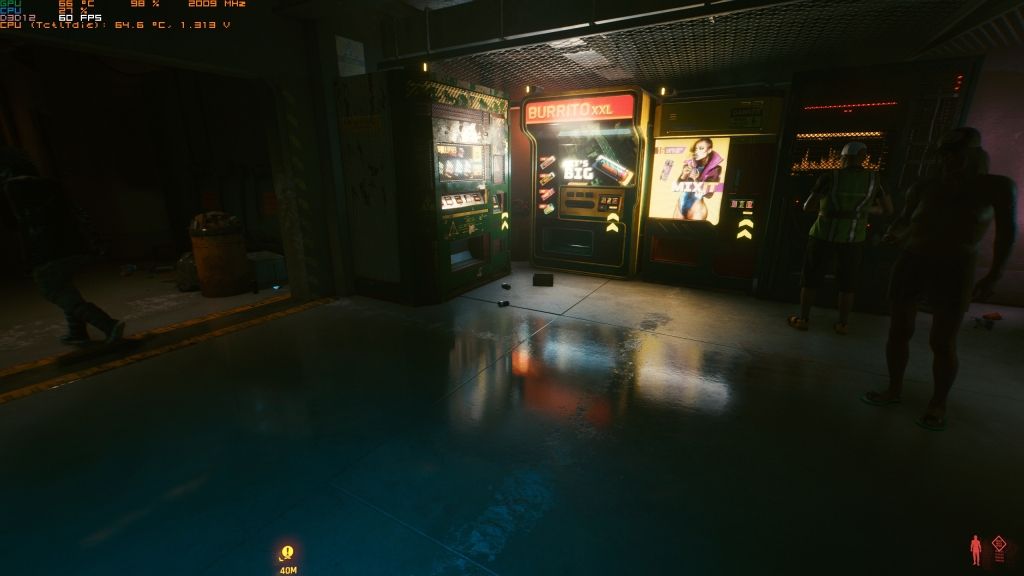
BENCHMARK POINT
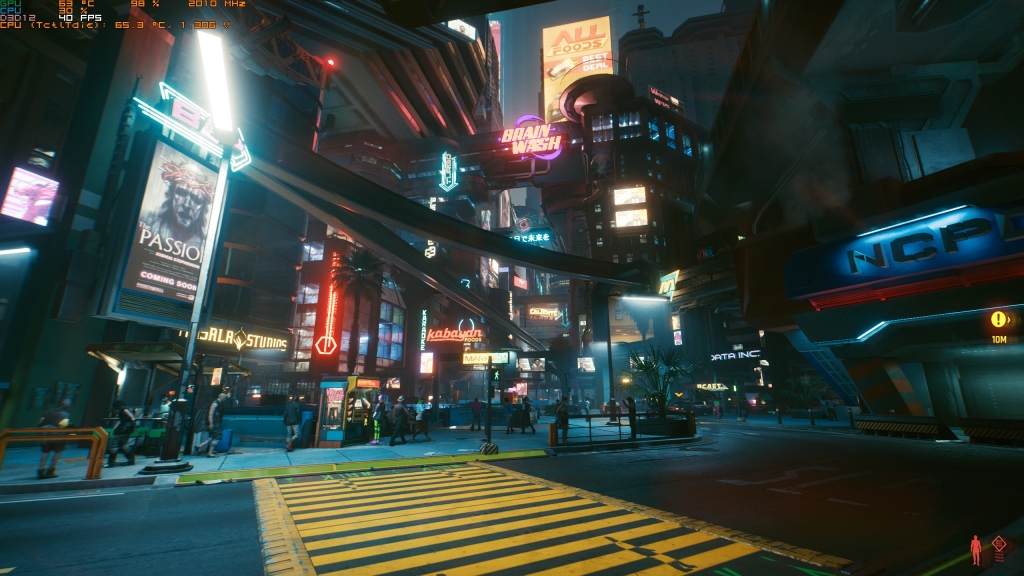
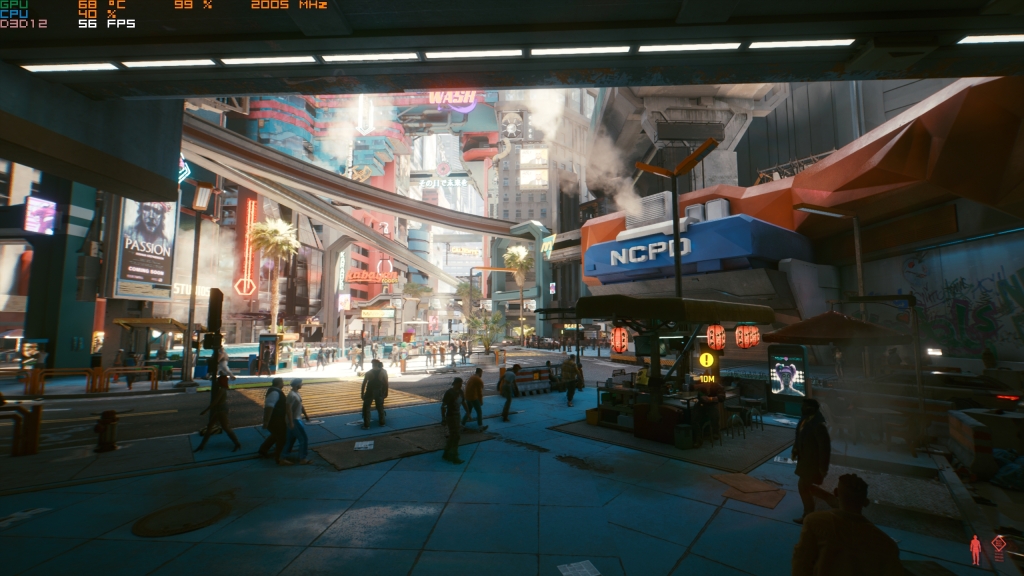
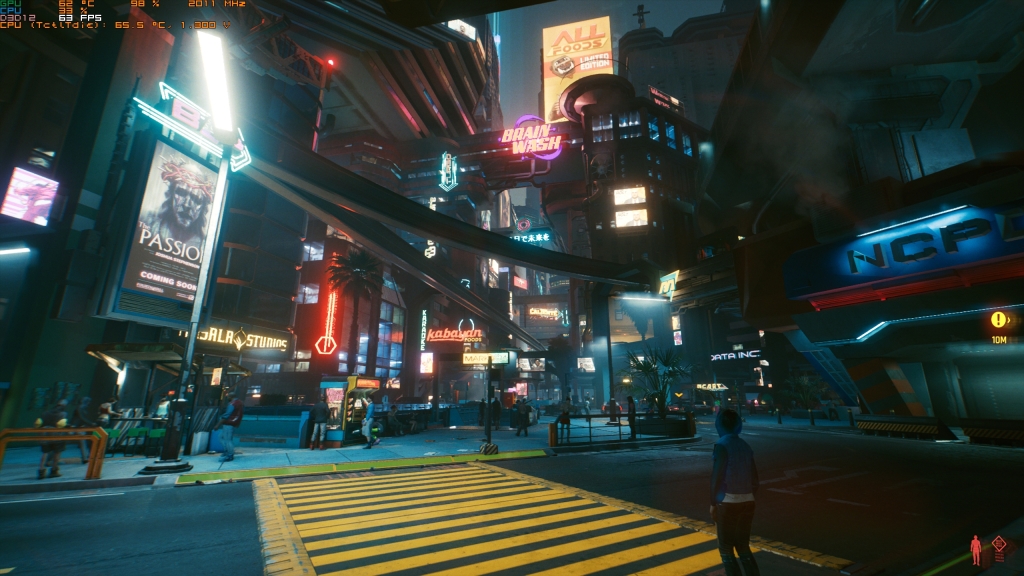
Before we proceed with the optimization, let us first establish a reference point for our guide. For this, I decided to use all high setting and pick this intensive location at night for our benchmark point by which we would be able to compare our optimized settings later on. The reason it’s on All High is because a regular PC gamer would often adjust settings to high prior to starting the game. A case could be made to increase everything at max from the get-go, but I will be doing this guide as if I myself am optimizing my own game. In that case, I would start from All High settings. Besides that, take note that our current FPS is at 40. We will now be targeting 60 and beyond without too much sacrifice on visual quality.
Is it even possible? Let’s proceed with the different settings.
HUGE DISCLAIMER!
My results may hugely vary with yours. Remember that even though I have a mid-range card, I still have 3600mhz CL16 RAM and a 5600x CPU. Settings that may be CPU-intensive for others may be non-existent in performance gains for me. Also remember that not all FPS differences between settings are the same for all hardware configurations. The differences between medium and high on my machine maybe 5 FPS, but for others it may be 10 FPS. So please keep that in mind. I will also be notifying you of which resource they are utilizing as we go through each of them.
SETTINGS WITH NO SUBSTANTIAL PERFORMANCE IMPACT
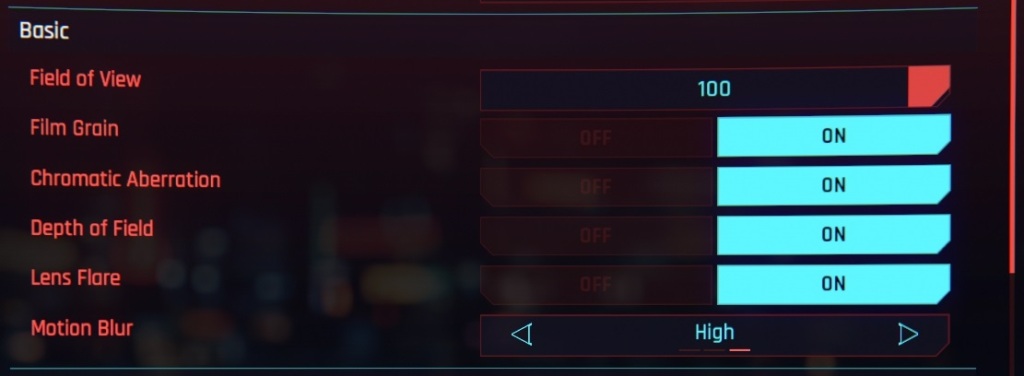
Basic Section
- Everything in the basic section where motion blur and other post processing effects can be found. Just adjust them according to you preference.
Advanced Section
- Contact shadows: GPU-related
- Improved facial geometry: I have no idea
- Local shadow mesh quality: Can be CPU-related
- Cascaded shadow range: CPU-related
- Distant shadow resolution: Can be both CPU and GPU-related
- Max dynamic decals: Both CPU and GPU-related
- Subsurface scattering quality: GPU-related
- Level of Detail: CPU-related
- Crowd Density: CPU-related
All the above can be turned to high or on without significant performance impact. When looking at the graphics setting in-game, the two “local” prefixed shadow settings affect shadows cast by light sources and the next two, the one prefixed by “cascaded” – affect shadows cast by the sun. Note that the shadow settings we have just both set to high relate to both indoors and outdoors. But they simply refer to the range by which they’re being drawn and the consistency against relative light sources. These do not affect the resolution of the shadows themselves. Hence, they have a non-existent effect in performance.
A NOTE ON CPU-BOUND SETTINGS
Remember the settings above that are CPU-related? I have read replies on my Reddit post that some of those settings resulted in frame-rate drops when toggling them to high or on.
These are the following:
- Cascaded shadow range: CPU-related
- Distant shadow resolution: Can be both CPU and GPU-related
- Max dynamic decals: Both CPU and GPU-related
- Level of Detail: CPU-related
- Crowd Density: CPU-related
Please be aware that these settings will matter depending on your CPU’s single-core performance. The reason I am NOT having problems with these settings is because the 5600x has truly remarkable single-core performance.
See 5600x’s impressive single-core performance results on CPU-intensive games here: https://www.reddit.com/r/Amd/comments/jxslr1/using_ryzen_5600x_with_only_2400mhz_ram_on/
https://www.reddit.com/r/Amd/comments/jxijtm/i_am_shocked_5600x_runs_the_original_2007_crysis/
For now, we will be looking into these GPU-bound settings first for two reasons:
- GPU-bound settings should be given topmost priority since it is the hardest hitter to game performance
- CPU-bottleneck issues are hard to spot without determining first where your frame rate drops are coming from. Is it because of a CPU or a GPU bottleneck?
This testing order will then allow us to identify whether or not CPU bottleneck still exists afterwards.
But what do they actually do? Let’s take a look.
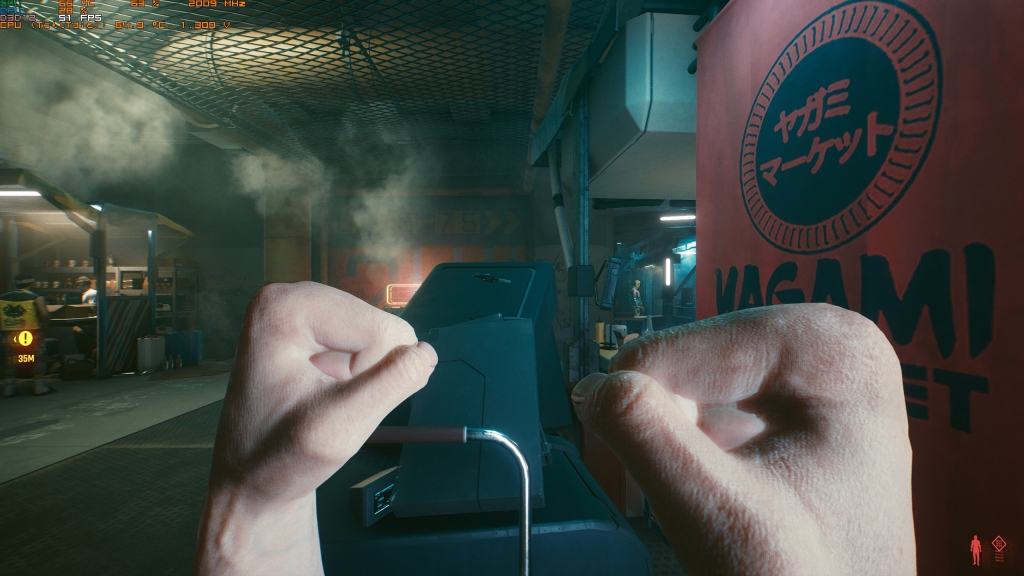
Contact Shadows


Contact Shadows enable the self-shadowing on characters. The performance hit when enabling these are non-existent but look at the additional depth it gives to our buddy Jackie. Notice how additional shadows are projected by his own facial structures into his own face. Notably near the nose area and the eyes. Depending on character position, this option will also affect their entire body’s ability to self-shadow. Leave this on.
Cascaded Shadow Range
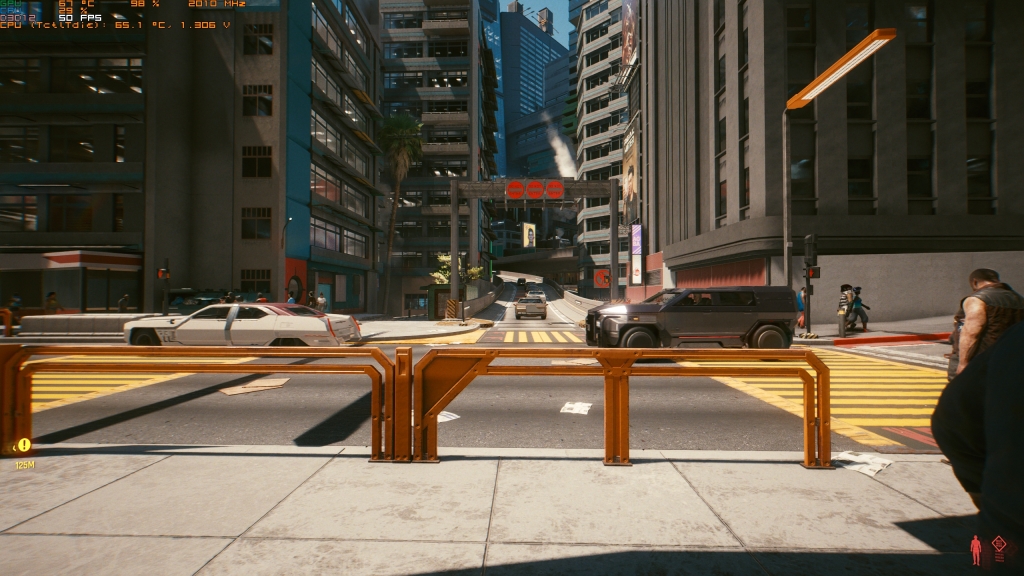
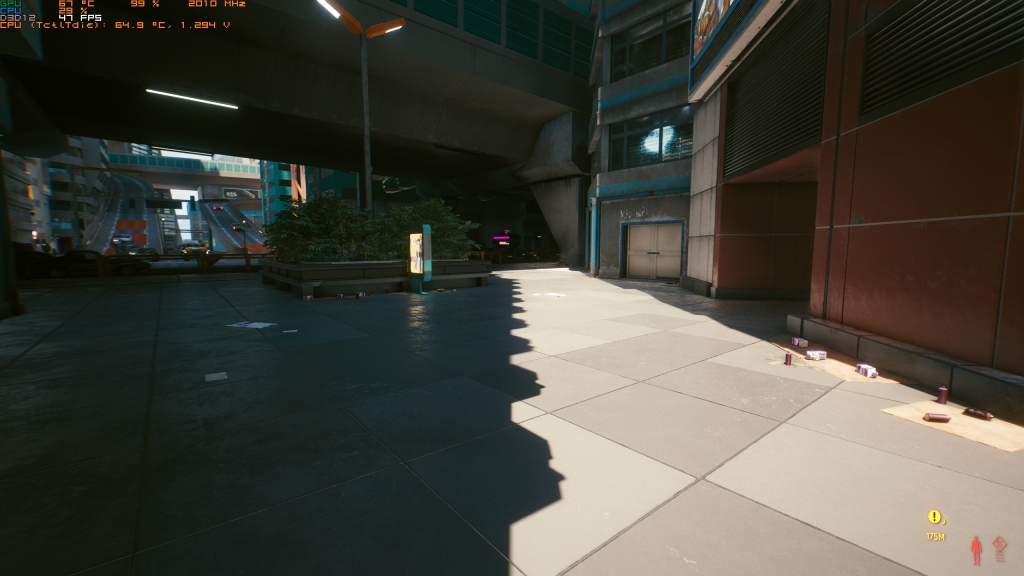
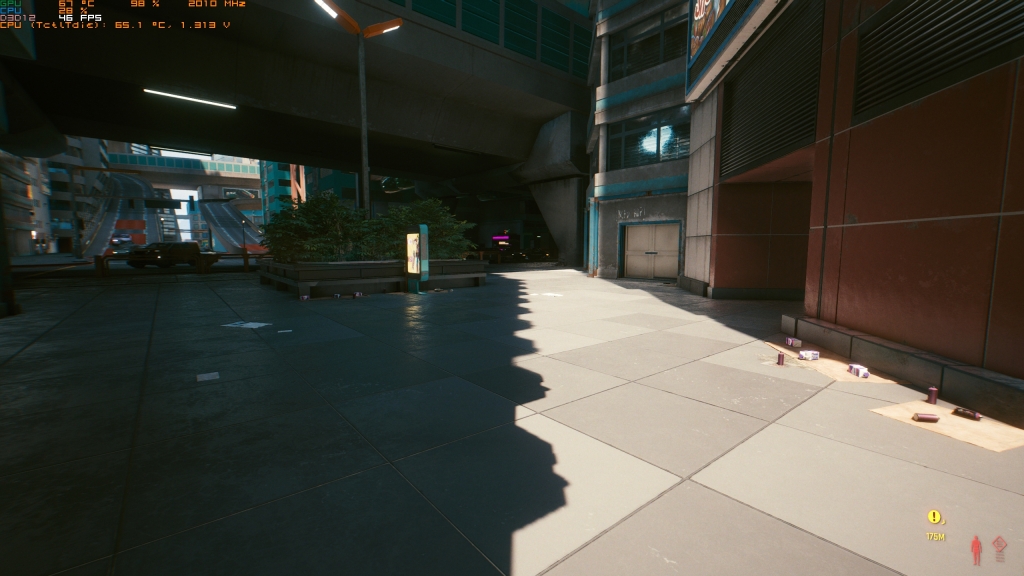
Next we can see how this option determines how far sun casted shadows are rendered in detail. At first glance, it may look similar, but pay attention to the shadows under the cement awnings in the right building. It becomes pixelated on low. There is also no performance hit to be had with this on high. Leave this on high.
Distant Shadow Resolution
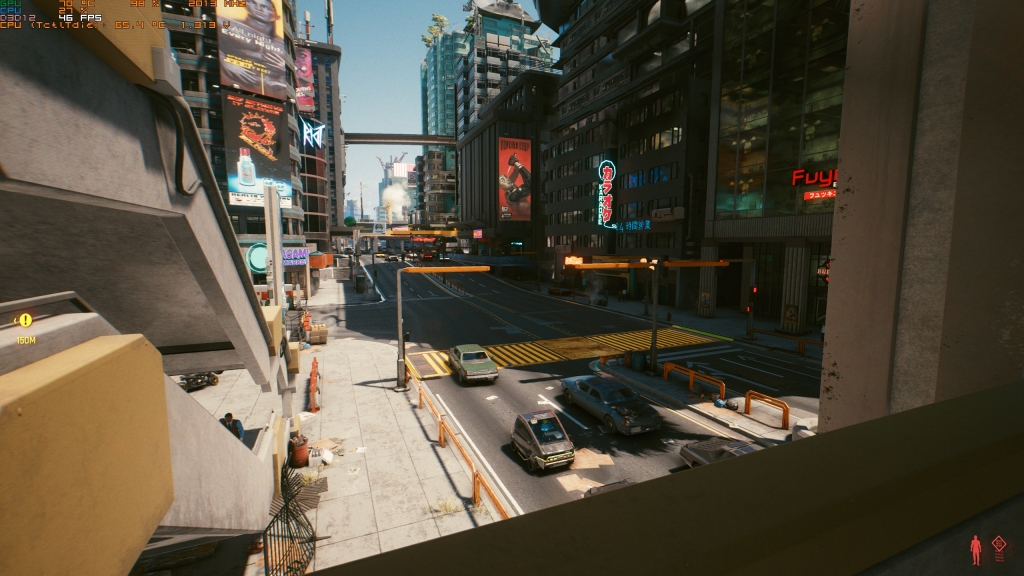
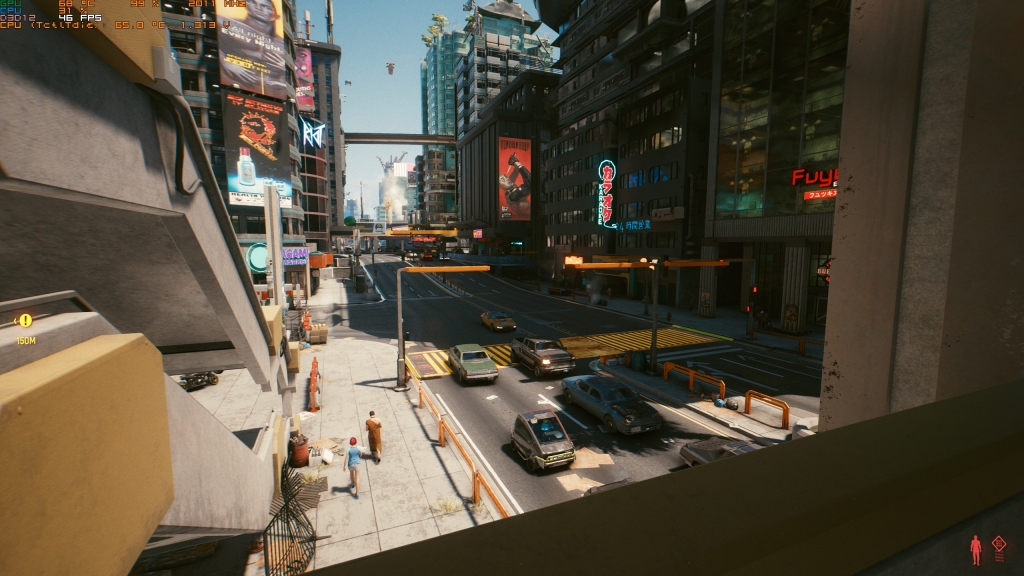
This may look similar with each other but remember that we’re dealing with the range by which sun casted shadows are drawn, so the differences can be seen on the shadows in the far constructed building at the back. Look at how the high setting has well defined shadows compared to low. Again, notice how performance is similar. So leave this on high.
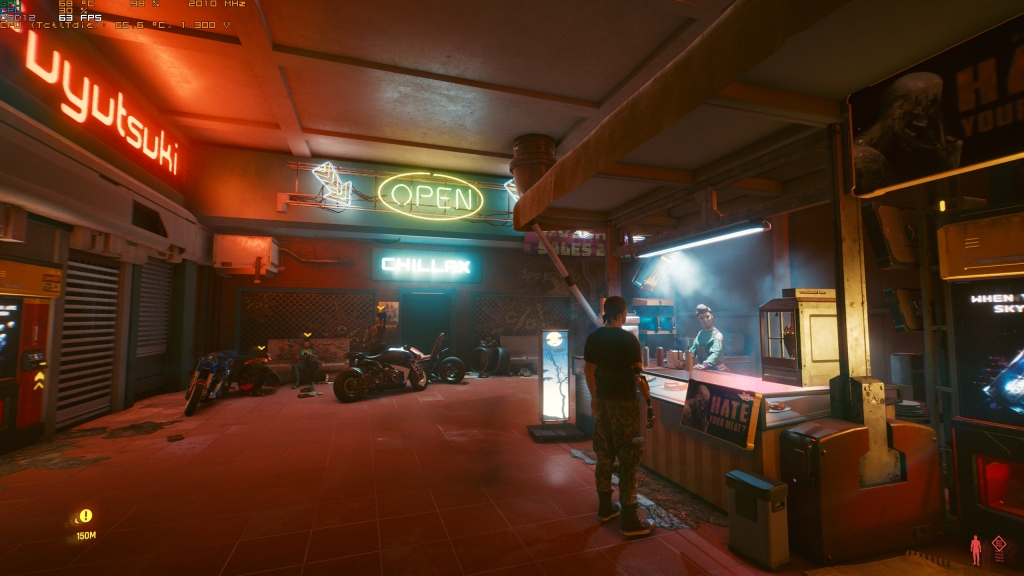
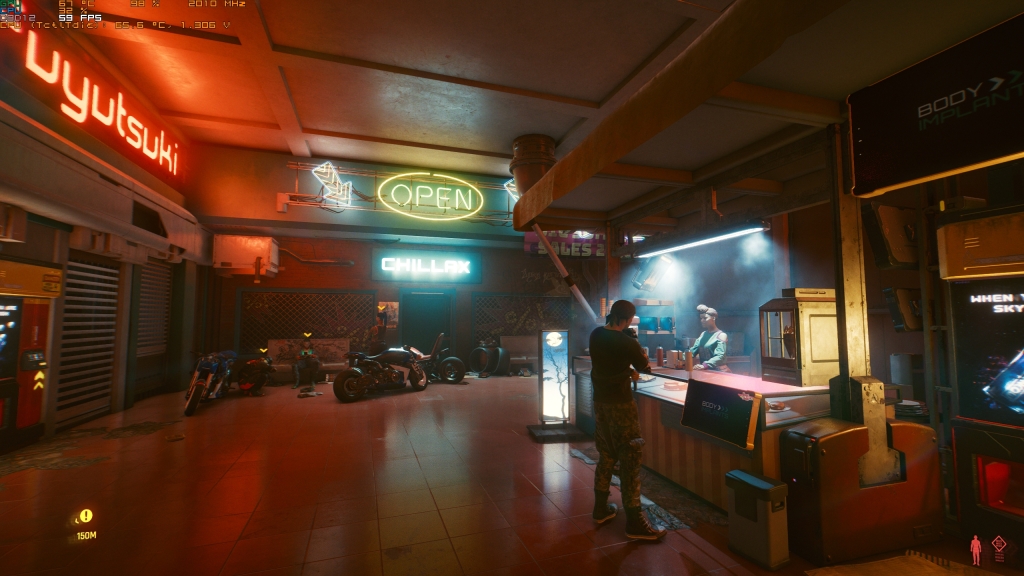
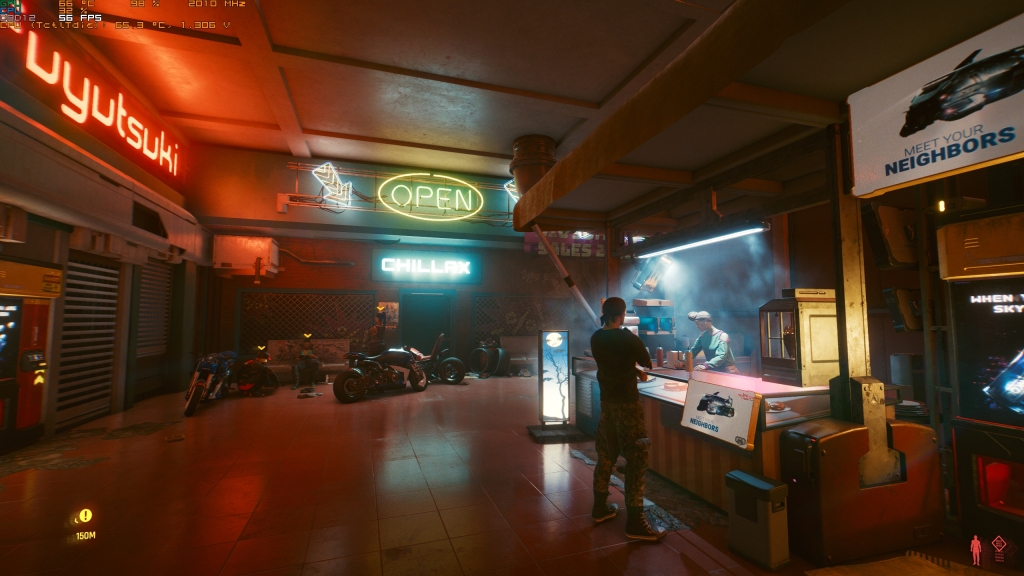
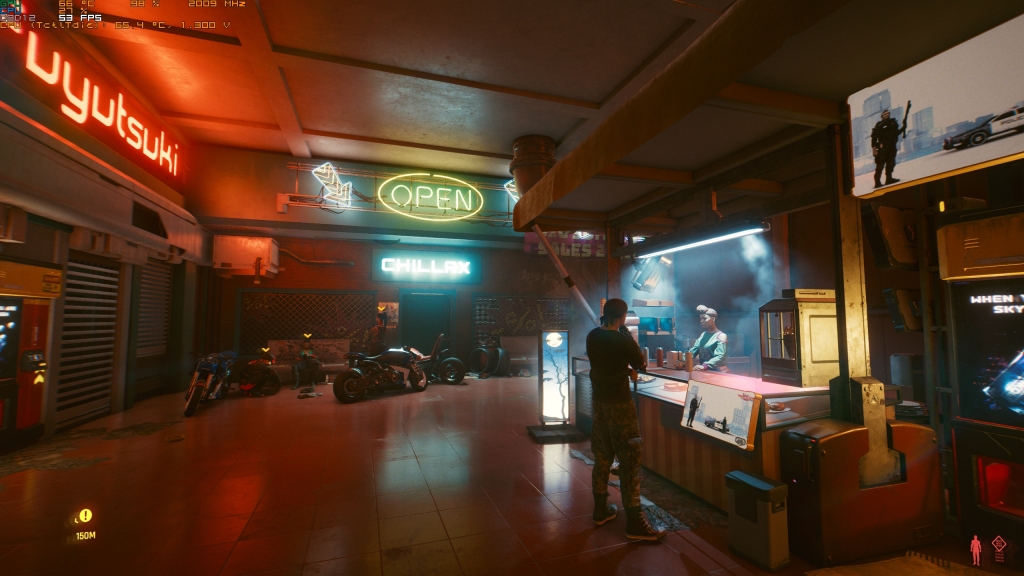
Max Dynamic Decals
This option determines the maximum number of bullet holes or cosmetic damage textures being drawn unto a surface. You can test this out by shooting repeatedly at walls. The low setting will have an early cutoff point and you’ll begin to see additional shots not rendering bullet holes compared to high. So just set this to high unless you want weapons to leave objects unscathed.
Subsurface Scattering Quality

Also important to take note is how subsurface scattering affects how light bounces off the skin. It’s very fortunate that it has minimal impact to frame rate while reducing shadow graininess and improving light dispersion on character’s skin especially when being hit by light. Just set this to high and worry no more.
SETTINGS WITH SUBSTANTIAL PERFORMANCE IMPACT
Now that we’ve ruled them out, we will be looking at the settings that are noticeable both visually and performance-wise. First up we have the other two shadow settings. While previously the shadow settings we’ve adjusted relate to the consistency and range by which they’re drawn, now we’re changing their resolution. This is why they’re significant in GPU performance.
Local Shadow Quality


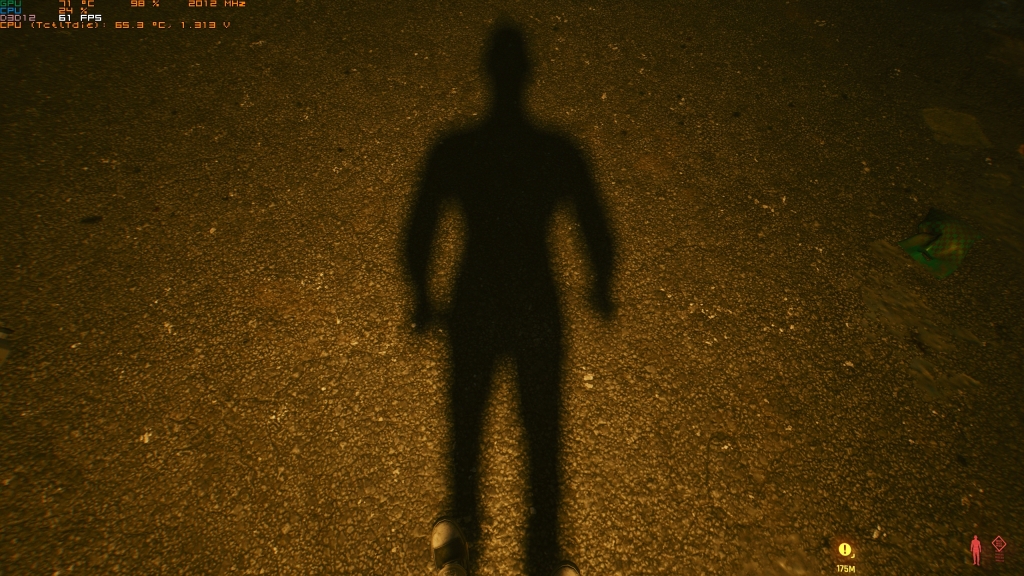
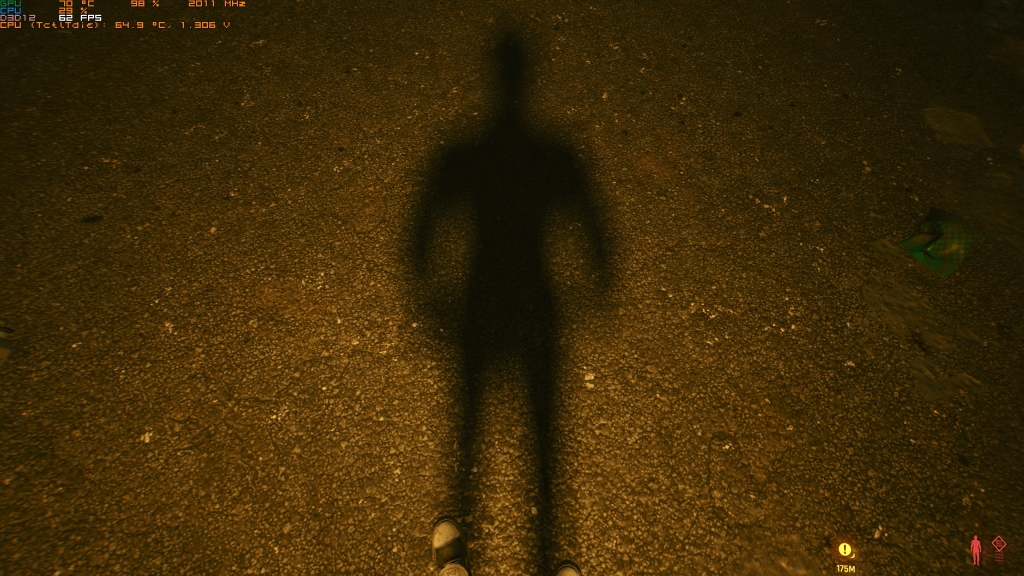
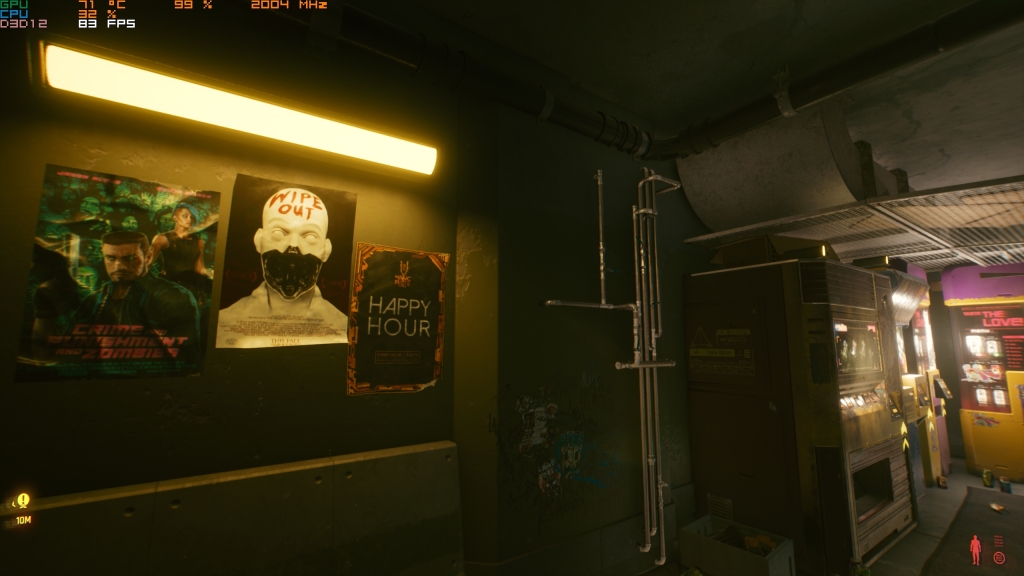
Local shadow quality can increase fps but remove interior and artificial light shadows. For this I recommend medium or high shadows. This setting is also relevant at night since cascaded shadows are replaced by local shadows due to the sun being absent and artificial lights take its place. If your frame rate drops below 60 during interiors and night scenes, try setting local shadow quality down to medium. I personally use high for this one. Take note that this also affects character shadows being projected by artificial lights – including yourself.


Cascaded Shadows Resolution

Next we have cascaded shadow resolution which affects the resolution of shadows cast by the sun. For this I recommend turning down to Medium just to gain 3 to 4 fps during outdoor scenes while still maintaining a smooth, soft-edged shadow quality. Don’t let these screenshots fool you; medium is better performance-wise than high. So I really recommend going medium on this one. Just don’t go low since it looks pixelaty bad.
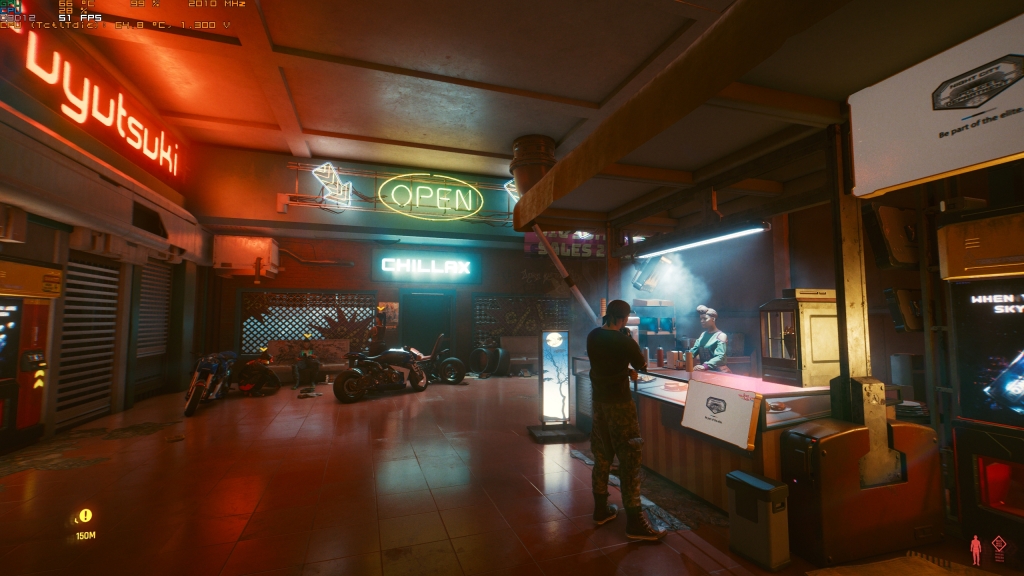
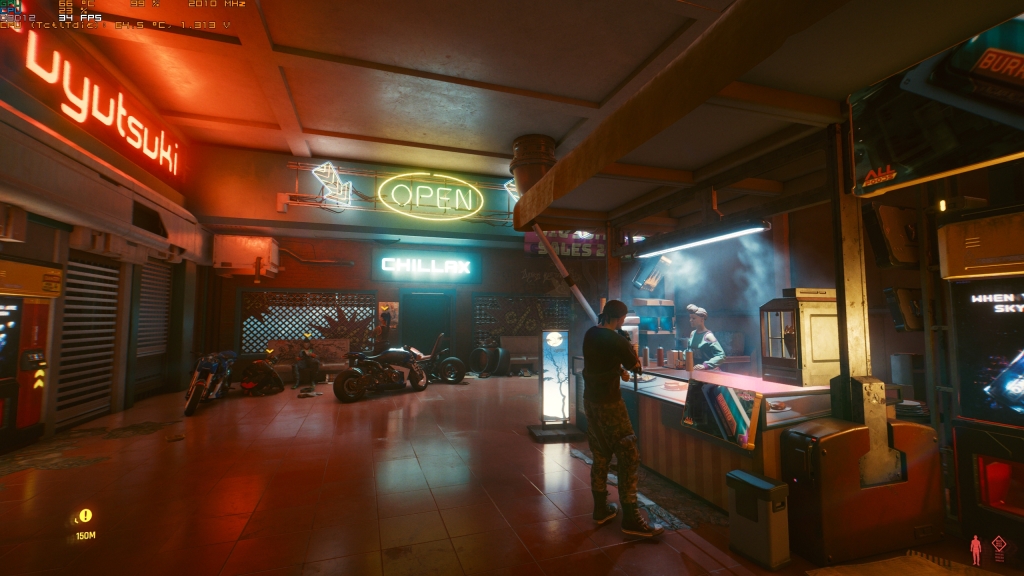
Volumetric Fog Resolution
Next, we move on to volumetric fog resolution which I think is one of the sneakiest hitter settings since its effect is not noticeable visually but performance-wise, it’s a hog. This affects both indoor and outdoors scenes as well.
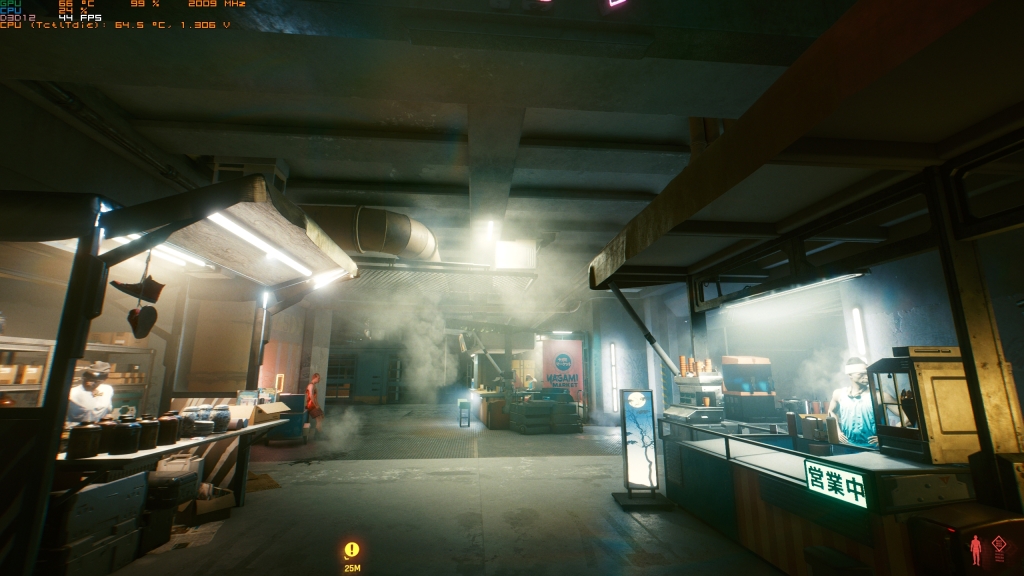
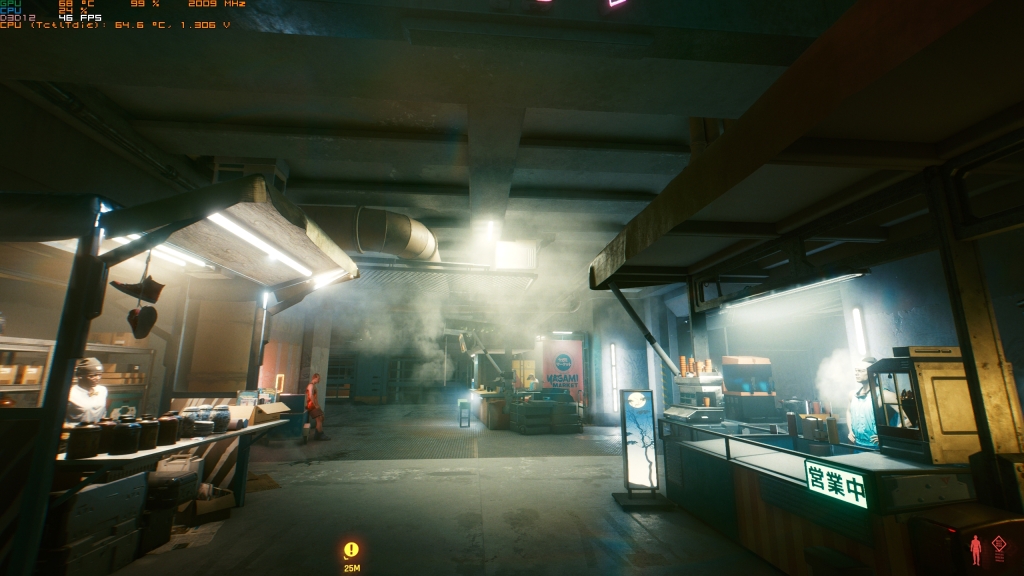
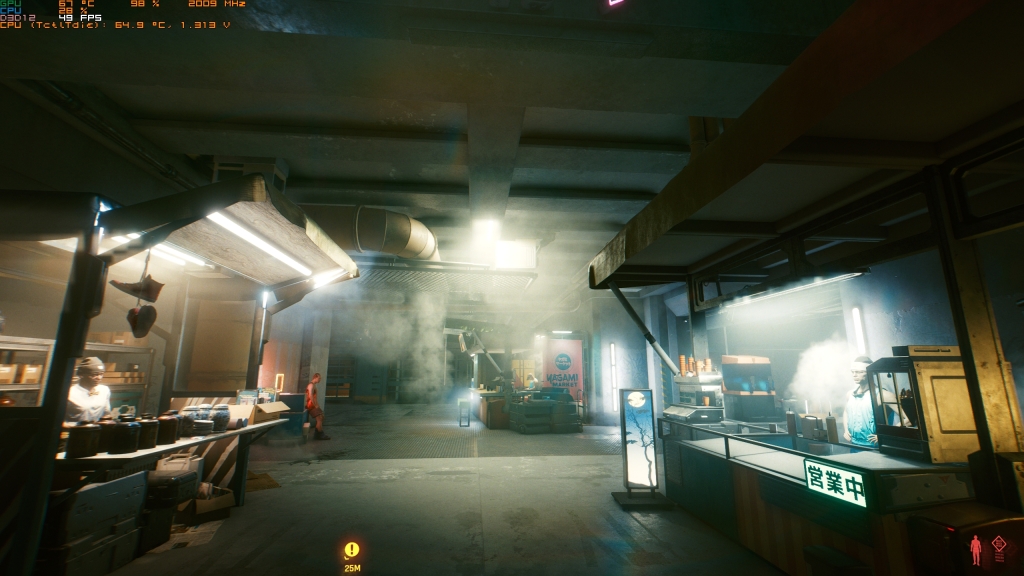
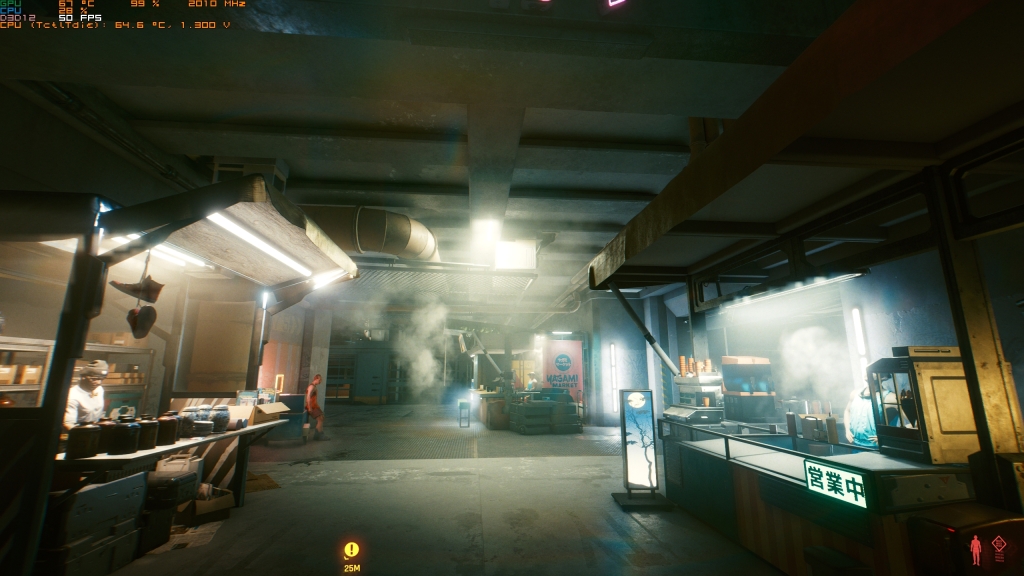
In here, we could see the biggest performance gain is going down to medium from high. Note that all settings contain dithering fog in some way – even on ultra. This is more noticeable when you’re moving.
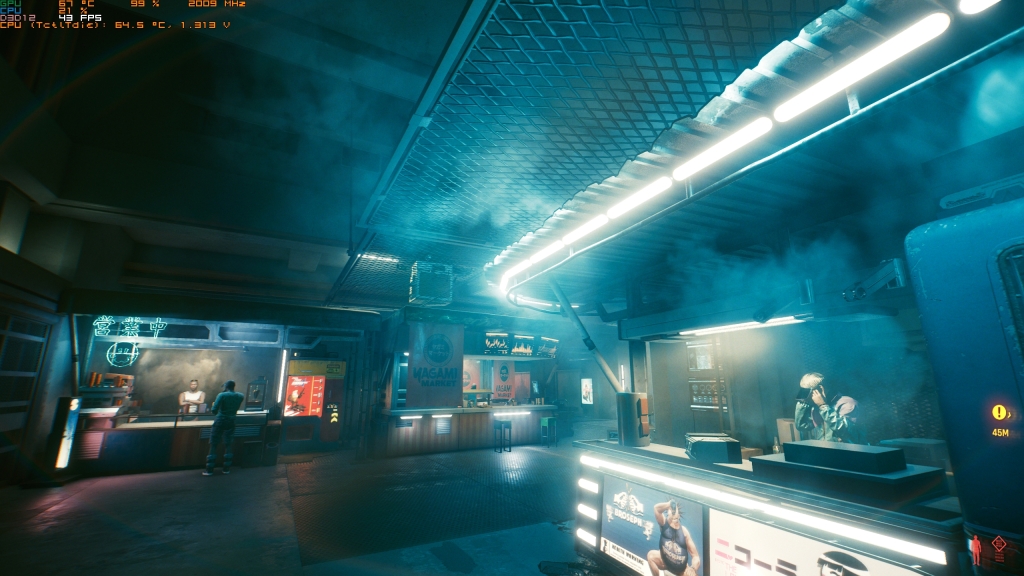
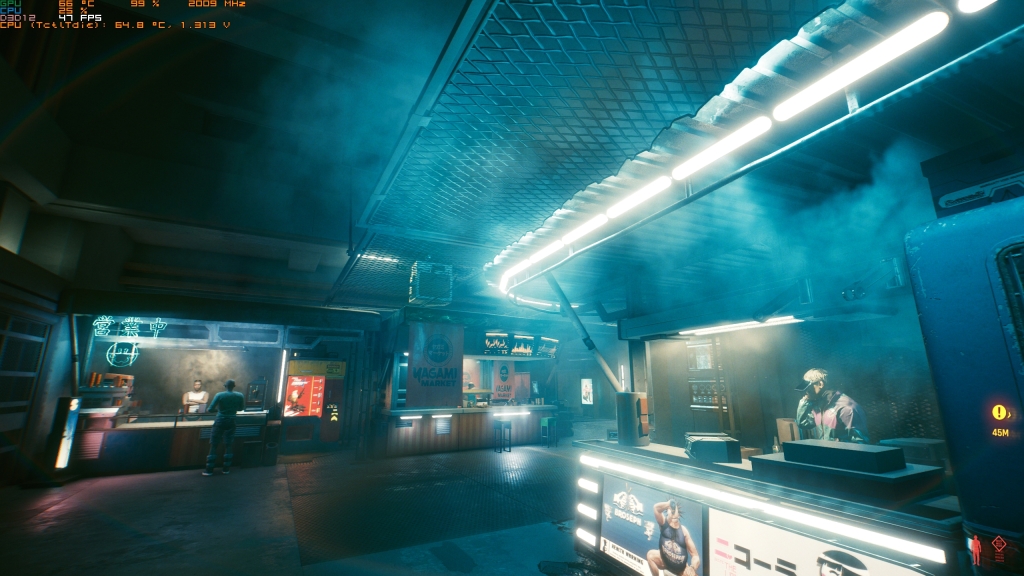
There’s just a slightly less pixelation inside the volumetric fog itself on ultra compared to medium but this is a highly recommended medium for me. If the dithering and “crawling” fog effect bothers you, then go ahead and go higher. Just don’t blame me if your frame rate drops under 60 since–
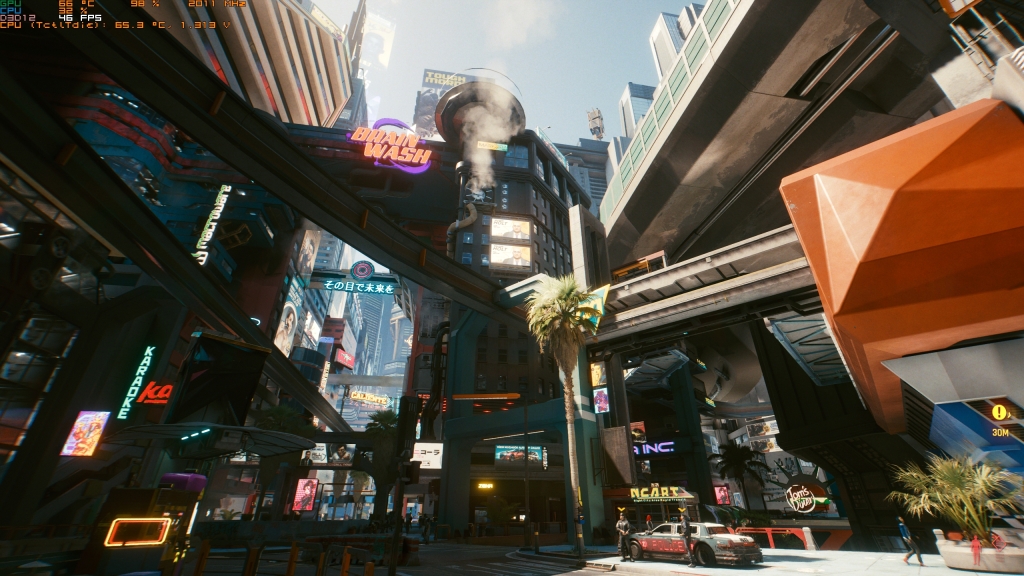
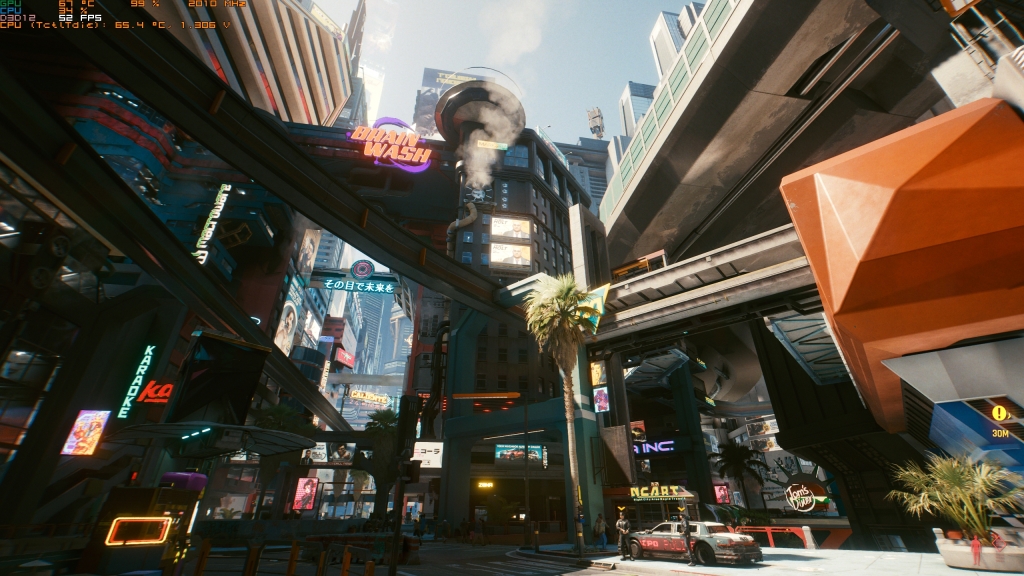
–yes, it will affect performance even during the day. Can you see any visual difference? Exactly. That’s why I recommend medium. Let’s move on.
Volumetric Cloud Quality
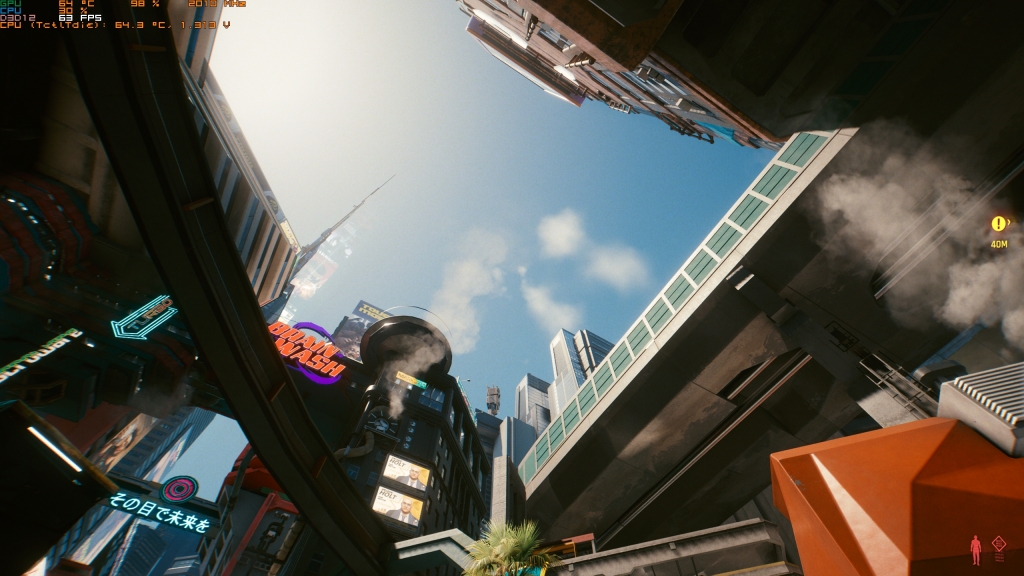
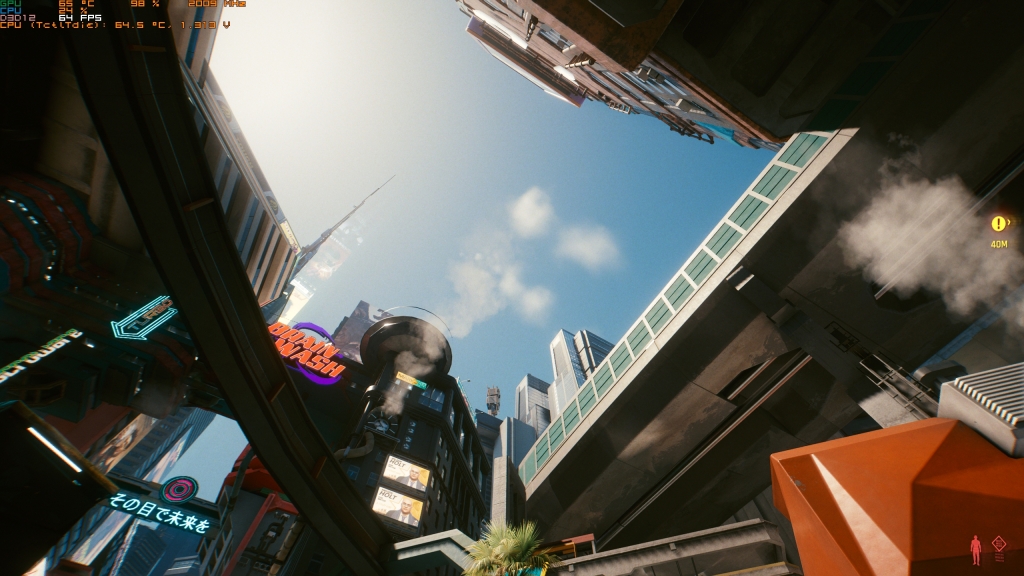
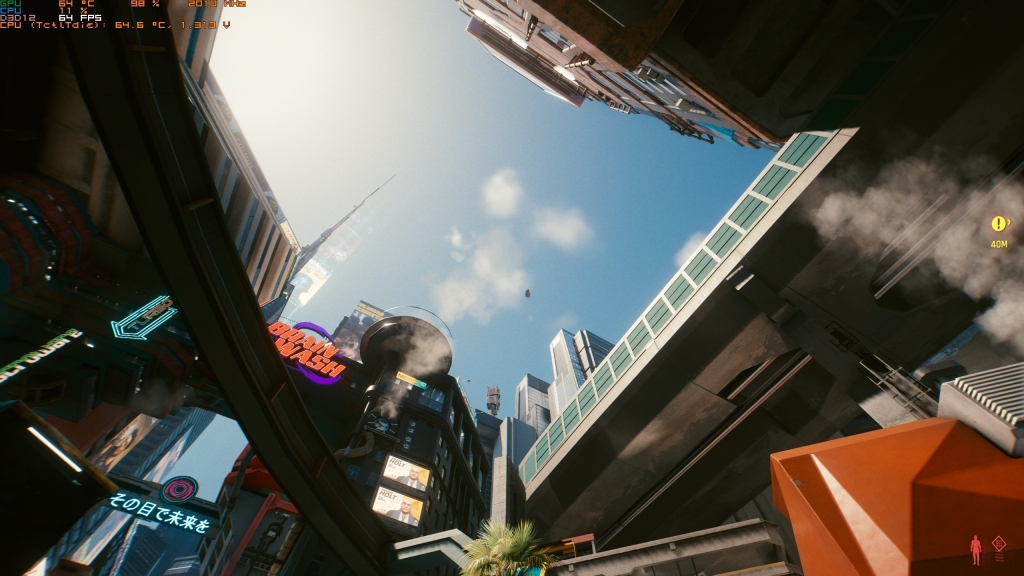
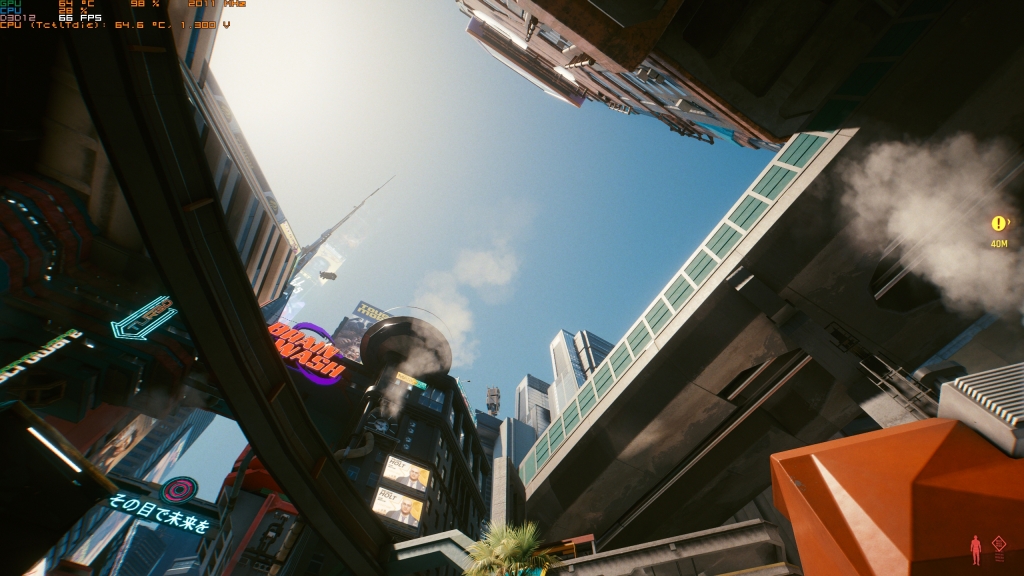
Cloud quality is exactly what it says. Toggles the volume of clouds, turning this off removes clouds in the sky while gradually increasing setting adds more volume to it. I just recommend any setting since it has close to zero performance impact. Maybe one or two fps when outdoors, but not enough to really warrant your attention. You can even turn this off if you want since probably you would be playing the game looking forward – not looking up into the sky.
Screen Space Reflections
Next up we have screen space reflections. This is the biggest hitter to performance when toggled all the way up.


Note that choosing the off setting will toggle baked in reflections instead which look very bad and laughable. Trust me, this looks even worse in motion. Also turning SSR off removes reflections from wet roads and specular surfaces. Going from low to Pyscho increases the range of objects that is being reflected by a particular surface with Pyscho just brutally murdering your framerate.
There’s also some sort of temporal noise around objects that gets more noticeable when going down to low from Pyscho. It has that grainy look to some reflective surfaces. For this I simply recommend medium since it strikes the perfect balance of having that reflective quality with minimal noise and a healthy performance increase. You can go high on this one if you have the frame rate budget, but considering the next step ultra is very similar to high performance-wise, you can just go up there instead. It all depends on what matters most to you. Turning this off should be your last resort since it removes reflective properties entirely and impacts the aesthetic of the game especially during the night. Some people, especially on this guide’s reddit post, prefer it off to avoid the “visual noise”. But those baked-in cube-mapped reflections just look so bad I’m unable to notice the noise in hindsight.
Ambient Occlusion


For ambient occlusion, I recommend medium. High may indeed add more depth shadows under more objects, but this is so unnoticeable compared to the number of frames it reduces. Take note that some scenes hugely suffer when AO is at high. Just do medium on this one.
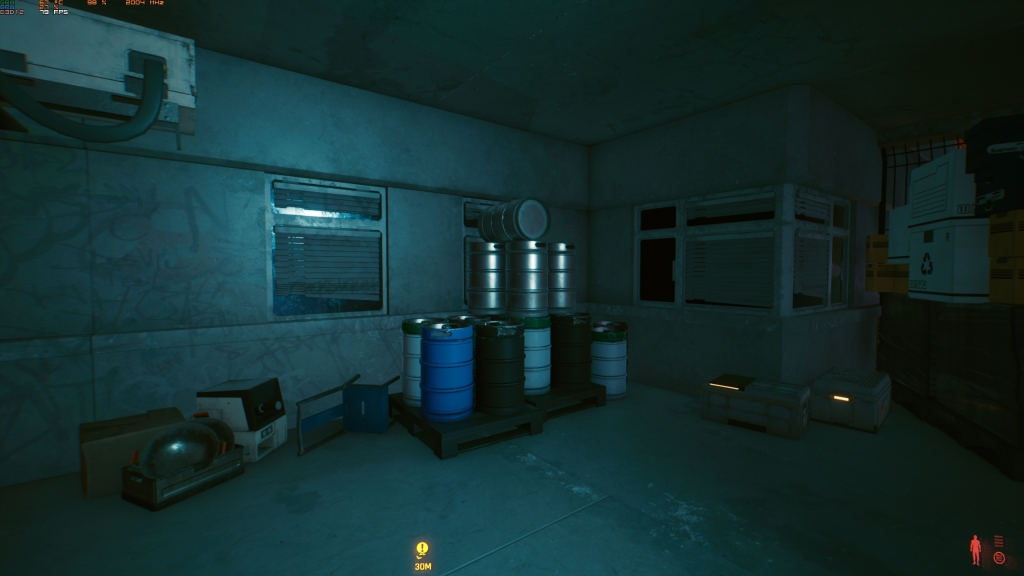
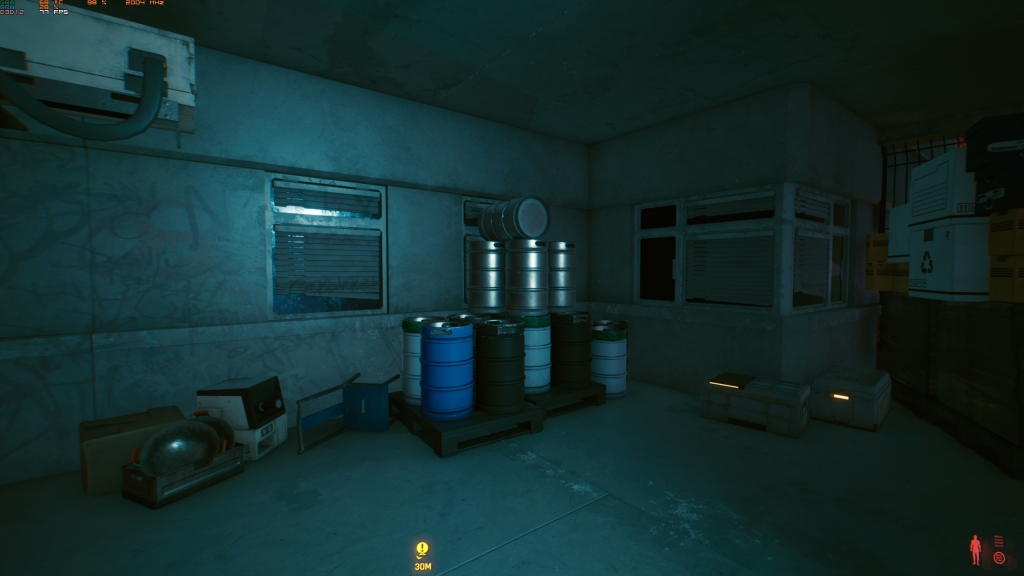
Color Precision
Next is my personal favorite – Color precision. This guy is probably the sneakiest bastard on here. Not only does it sound unimportant and trivial, finding the difference between it on and off is next to impossible. However, this option can actually determine whether you can reach 60 or not. And unlike other settings that matter only on scenes that call upon them, color precision is constantly taking effect and so will reduce your frame rate at all times. Take a look at this certain spot in the game. This is one of the most demanding scenes that I’ve been and it all comes down to color precision to be set to medium for our frame rate to go beyond 60 fps.
Look at the difference in performance that it brings. Can you see the difference visually? Zoom in on these pictures if you can find Wal–I mean any difference.

Looking closely on still shots, there’s maybe a hint of blurriness to the medium setting compared to high but how will anyone notice this during normal gameplay is beyond me. Colors are still exactly the same without no dithering or banding whatsoever so it’s still a mystery to me what it really does. Now you may be noticing color grading issues when using lower color-bit monitors but as far as my experience is concerned, there is none.
Mirror Quality


Finally, we have mirror quality. This obviously affects scenes where mirrors are rendering your reflection. The very start of this game makes this setting known and probably made the worst impression ever if you had this setting turned to high before starting the game. For my end, I find the medium setting to have the perfect balance of reflective resolution and performance. It’s not a perfect 60 during mirror scenes even on low, but medium is a perfect-trade-off for me and these are limited gameplay moments that don’t require frame-rates to be over 60 for an enjoyable experience.
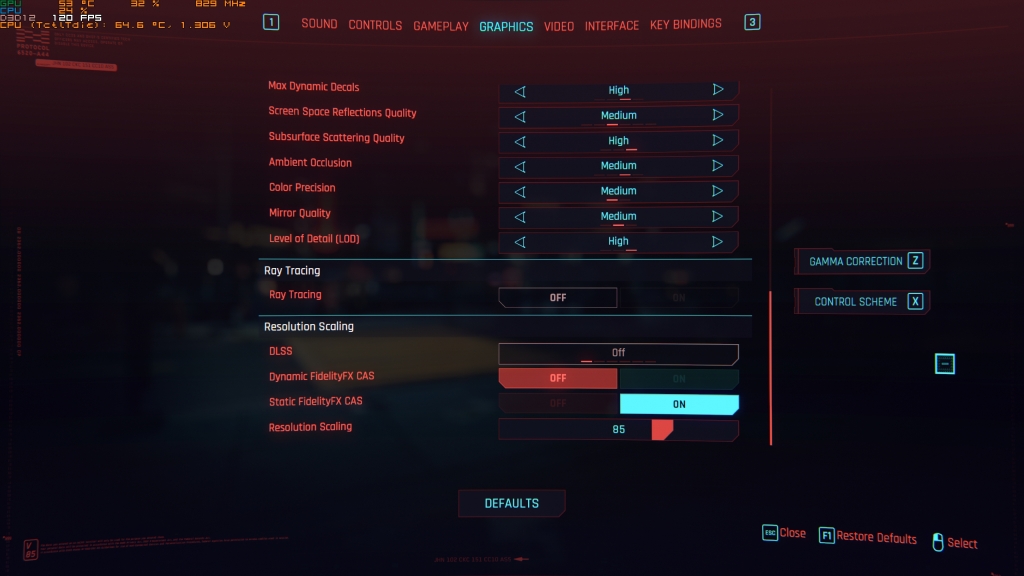
Static FidelityFX CAS

Going down to the very bottom we can specify a static internal resolution. This is our final cherry on top. Since I’m on 1440p, going down to 75 percent would lead me back to 1080p, so I’d want to avoid it. Hence I will be finding the sweet spot between 75 percent and 100 percent which would give me constant 60 fps on regular gameplay. The percentage that works for me is 85 percent.
UPDATE:
Dynamic FidelityFX CAS Works Now
This option is now functioning correctly in 1.04. If you find Static FidelityFX to be too restrictive, this is the best option. What I advise you to do is:
- Load your own benchmark save point that reports lowest FPS you can get because of GPU bottleneck. The reason for this is for us to be able to set the gold standard by which every other section in your game would be guaranteed 60 fps and above.
- Find your own optimized graphics settings using this guide as – your guide. Don’t ever move in that loaded save point for accurate results.
- Use Static FidelityFX to find the perfect resolution percentage which gets you just above 60 fps. Maybe give 1 or 2 frames above it for allowance.
- Turn off Static FidelityFX and set the same percentage value above to the minimum resolution target of Dynamic FidelityFX.
- Set Maximum resolution target to 100.
- Set your own target framerate lock to the threshold by which you would like the game to drop resolution. It can be at 60 sharp, or it can be anything above it.
As a freesync monitor user, I prefer my framerate to be prioritized first before resolution so I set my target framerate at 68 and minimum resolution at 85. That way, the game will try to render at native resolution but will drop to 85 percent of my resolution when it gets below 68. Simple as that.
USE TRIXX BOOST INSTEAD OF STATIC FIDELITYFX
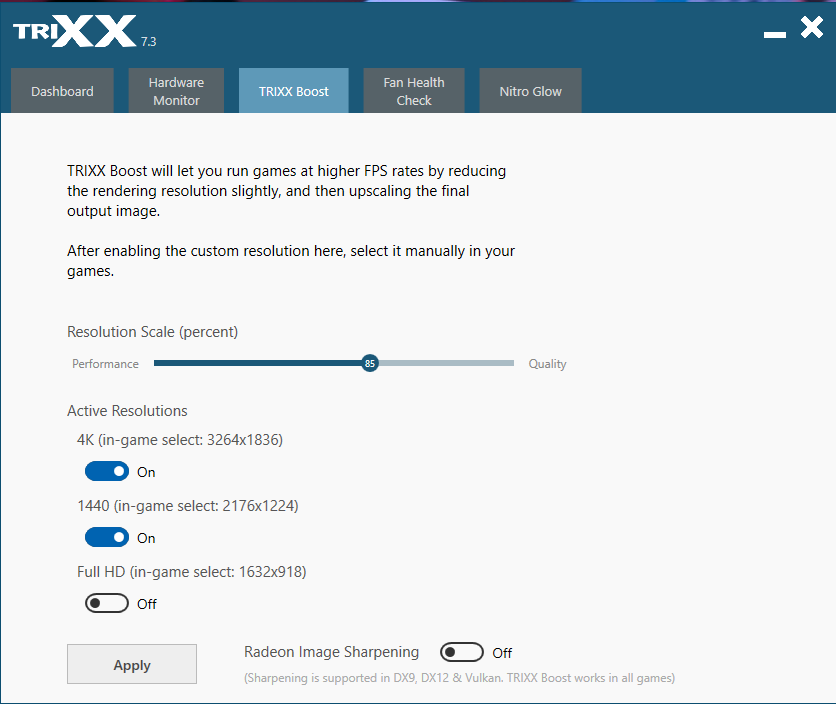
If you have the 5700xt from Sapphire, use the TriXX boost software to enable the 85 percent of your native resolution instead of using AMD’s FidelityFX. This allows you to select an arbitrary resolution that’s 85 percent of your native resolution as an option rather than have the game constantly downsample native 1440p down to 85 percent and upscale it back to your native screen as you play along. This is more CPU-friendly and I can confirm – a frame higher than the same 85 percent of Static FidelityFX. However, there is slight noise and aliasing when using arbitrary resolutions such as these. Use at your own discretion.
OPTIMIZED SETTINGS SUMMARY:
So far, this is what we’ve done.
1.) Turn ALL toggable settings On and ALL slider settings to High
2.) Turn to Medium ONLY these settings:
- Cascaded Shadows Resolution
- Volumetric Fog Resolution
- Screen Space Reflections Quality
- Ambient Occlusion
- Color Precision
- Mirror Quality
- Optional: Local Shadow Quality, Volumetric Cloud Quality
3.) If you are not Sapphire GPU owners: Use 80 to 95 percent resolution slider at the very bottom or just utilize dynamic resolution and set your target framerate. If you have Sapphire GPUs, use TriXX software to enable 85 percent resolution for your chosen native resolution and select it in-game instead of the the AMD FidelityFX slider.
YOU FORGOT ABOUT CPU-BOUND SETTINGS
No I didn’t. In fact, this is the perfect time for that. Now that we’ve made the necessary changes to alleviate possible GPU bottlenecks through our settings above, it’s time to evaluate your current performance. Answer these two questions:
- Are you still having framerate drops below 60 fps?
- What is your GPU usage percentage?
Here are my next recommendations based on your answer conditions:
- If you are NOT dropping below 60 fps and GPU usage is at 99 percent: you are GPU-bound and have met the main objective of this guide. This is the ideal scenario we want to be in. Congratulations.
- If you are dropping below 60 fps and GPU usage is at 99 percent: you are still GPU-bound and our settings are not enough to reach 60 fps. Consider dropping down ONLY the settings I’ve specified in STEP 2 of our OPTIMIZED SETTINGS SUMMARY. You may fiddle with other settings but these will be more apt for the next two conditions.
- If you are dropping below 60 fps and GPU usage is BELOW 99 to 95 percent: You are now being CPU-bottlenecked. Consider adjusting these options only:
- Cascaded Shadow Range
- Distant shadow resolution
- Max dynamic decals
- Level of Detail
- Crowd Density
- If you’re NOT dropping below 60 fps and GPU usage is also BELOW 99 to 95 percent: You are CPU-bottlenecked but not in a bad way. You just have a good GPU, go flex it if you want. Maybe you’re on the middle of a CPU upgrade transition. Still, if you want more FPS, consider adjusting the same options above if it makes any changes:
- Cascaded Shadow Range
- Distant shadow resolution
- Max dynamic decals
- Level of Detail
- Crowd Density
CPU-BOUND USERS CAN DO THE NEXT STEP BELOW
THE INFAMOUS HEX EDIT OF THE GAME’S EXE
UDPATE: AS OF PATCH 1.05, HEX Edit is no longer needed. CDPR has already issued a statement that thread utilization is fixed for 6 cores and below. The gains that reportedly existed on AMD processors upon Hex editing were not entirely true as well. It was just a blanket statement that generalized the gains for the lower-end AMD 3300x and was applied to all Ryzen processors as a Placebo conclusion.
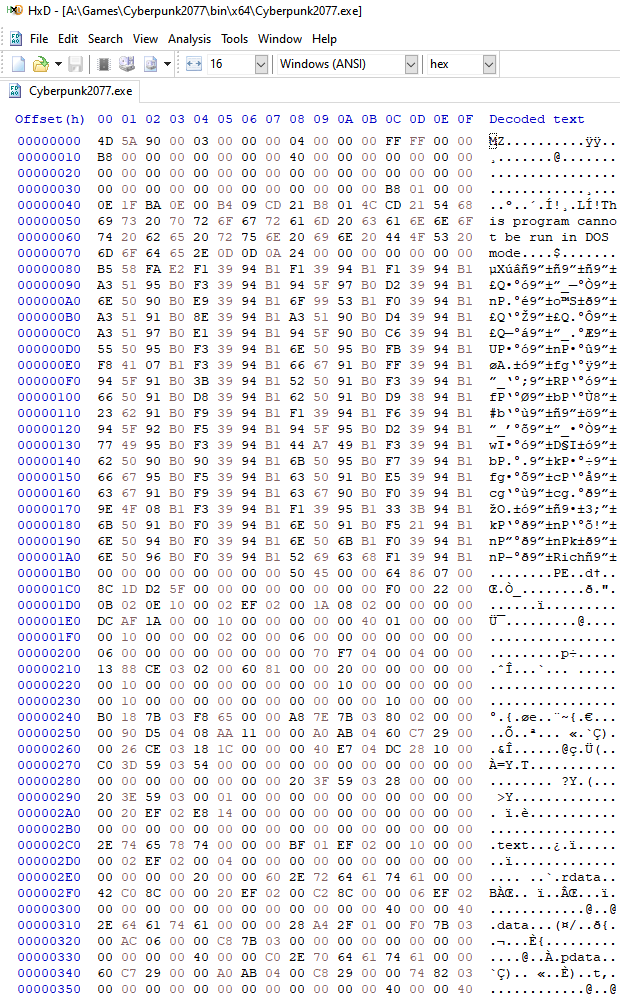
This reportedly improves utilization of CPU threads for AMD users. You can find lots of tutorials around the net for this one so I’m not going into detail on this. However, before you apply this fix, take note of where you fps drops are coming from. Are they GPU or CPU bottlenecks? If your frame rate drops while GPU usage is also dropping and you’re using a Ryzen CPU, then this fix might be for you. But if your frame rate drops while your GPU usage is at 99 percent or around that, then the benefit gains you may be smaller than you expect. This fix will be primarily ironing out the 0.1 percent lows of your playthroughs rather than your FPS average IF you are GPU-bound. If you’re trying this out because you wanted to increase FPS at 1440p, your gains may be very small. I recommend this to people with 1080p screens and are experiencing CPU bottlenecks during their sessions. It wouldn’t hurt to apply this regardless though, especially for AMD users. Just don’t expect mind-blowing results if you’re already GPU-bound.
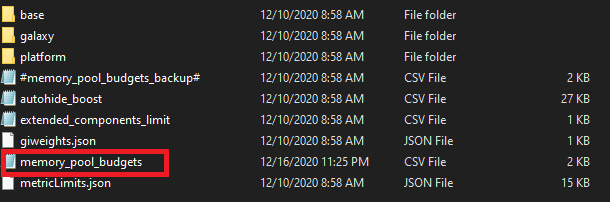
Memory Pool Budget Adjustment (Concretely proven as Placebo)
UDPATE: AS OF PATCH 1.05, The memory pool budget csv has been confirmed by CDPR as a leftover file that’s not being read by the game in any way. They’ve now deleted it on this patch.
I’ve seen this all around the Net and while I can’t definitely speak in behalf of those who benefited from it, I think this is just placebo. Benchmarks I’ve seen that provide “evidence” for this fix are simply within the margin of error to be called anything substantial. However, this could be of huge help to those who are memory limited – both VRAM and system RAM. This is just simple to do:
- Simply go to “..\Cyberpunk2077\engine\config” and open memory_pool_budgets.csv . Simple notepad will be able to open this file.
- Find the PoolCPU and PoolGPU rows and change the values inside the PC Column to 0. Some are setting calculated static values for these but I would strongly advise against it.
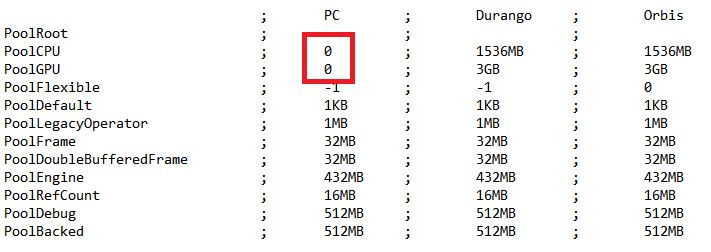
What does this mean? Well, it turns out memory allocations for the PC version are set exactly the same as our last-gen console brethren. Xbox and Sony machines are just beside PC and are named Durango and Orbis respectively. What we’ve done here is unshackle restrictive memory allocations for our version and set them dynamically. I am not an expert on this one that’s why I can’t recommend this as something important and mandatory. But you could still try this out and report back its validity.
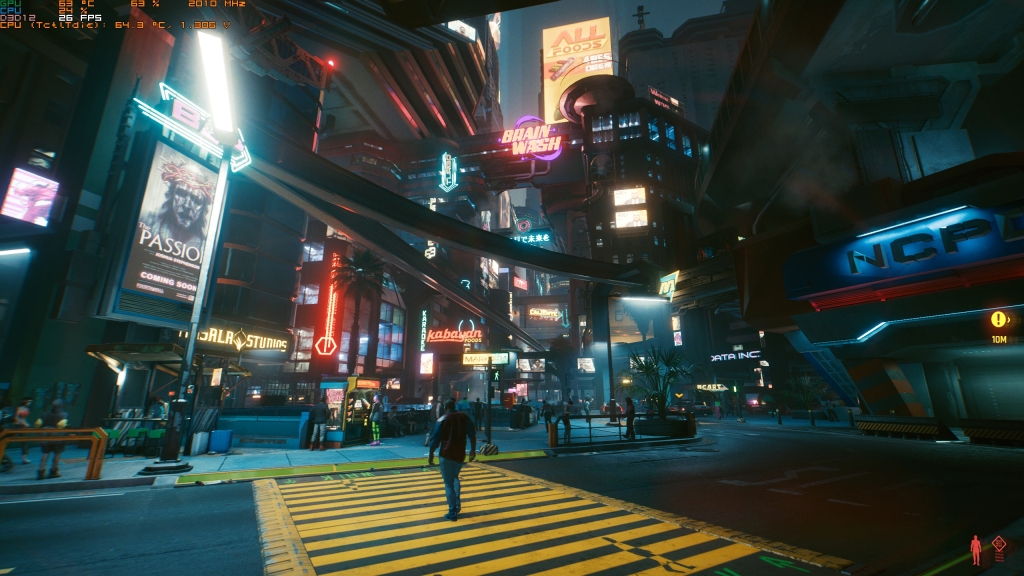
THE MOMENT OF TRUTH!
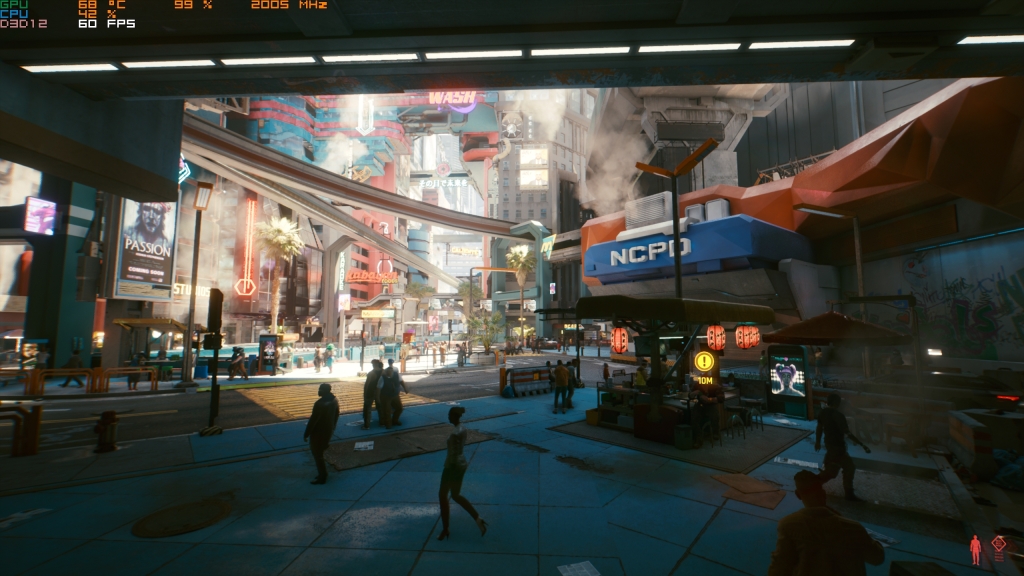
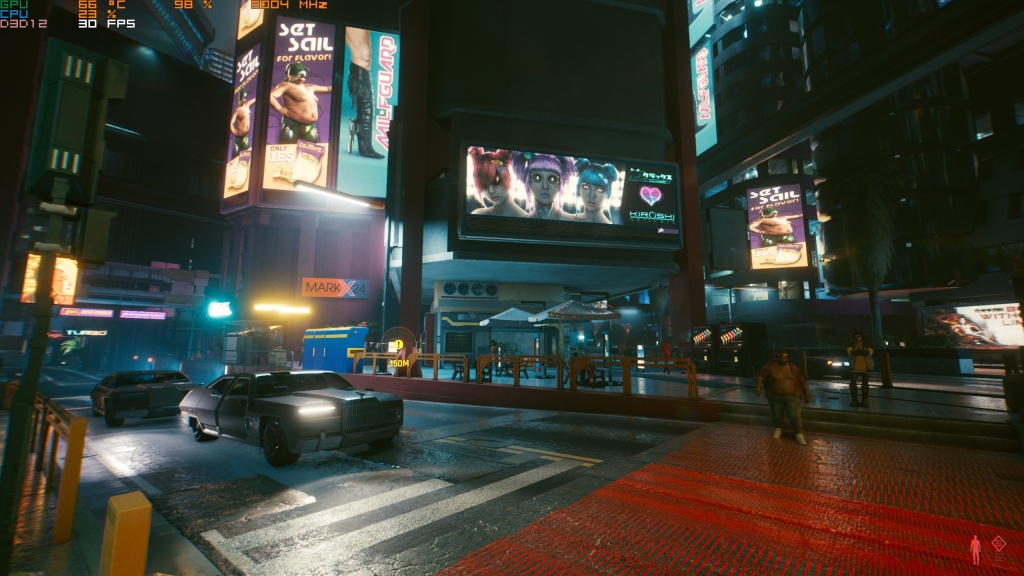
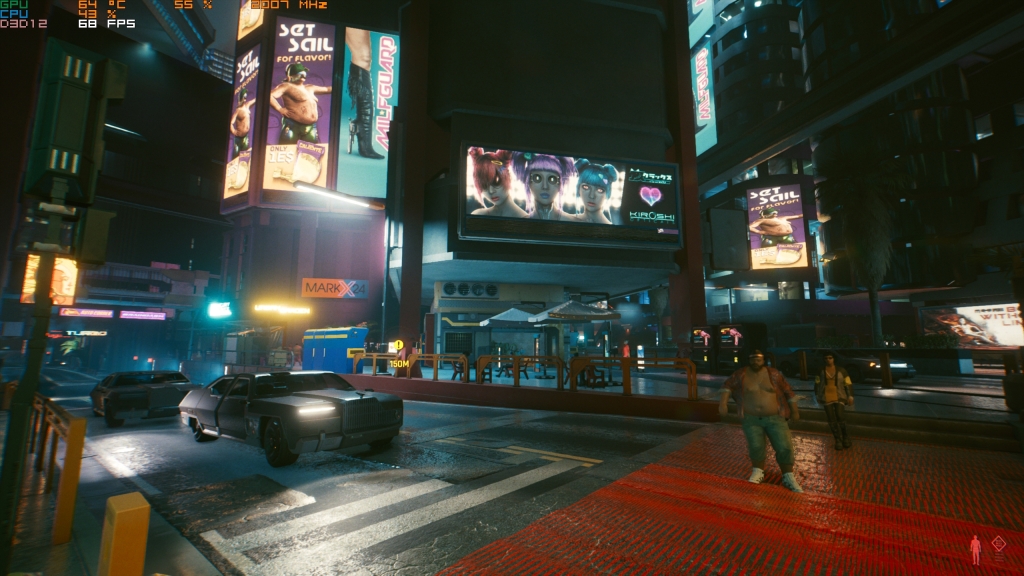
Now let’s compare my chosen benchmark points before and after our optimized settings. I have chosen these locations in the open world setting where NPCs are roaming around and most preferably nighttime because this is when the lights go crazy and all sorts of shadows and volumetric lights are putting our GPU to work.

Let’s not forget close-up scenes as well. These are also graphically-intensive situations to render. We all remember how Streetkid background starts right?

So how does optimized settings fare?

Phenomenal. Let’s have another example.


Look at how drastic our performance has become. Is maxed out settings any different from our optimized settings? Maybe, if you squint too hard on your screen. You be the judge. For me, the image quality still looks similar for the most part but it’s in the performance that the difference is huge.
MY OTHER ALTERNATIVES FOR CONSISTENT PERFORMANCE
What if you’re still unable to reach 60 fps after this guide? Well, here are my recommendations for a next-gen cyberpunk experience with high graphical fidelity and consistent performance:
- Make a compromise to the 60 fps standard and lock your game to 30 fps but ramp up your settings to ultra. This results in consistent frametimes albeit in a lower framerate but you’re getting the best fidelity.
- Lower ONLY the settings that I specified to be on medium to low. Do not change those settings that are already on High since they will give you nothing. Maybe they will if you’re on very low-end hardware, but for me, you should not be playing the game on lower-end hardware since you’re just gimping the experience both visually and performance-wise. Wait till you get better hardware for the game experience to be given its due justice. This is not a jab at you or some sort of snarky remark, just a friendly advise.
- Double down on that rendering resolution slider and decrease it until you reach 60 fps. Be prepared for blurry town but that’s your choice.
- You can also try “downgrading” to a smaller 22-inch IPS monitor with 1080p native resolution to get a high pixel density while gaining huge performance. My advise would be to never go beyond 22-inches 1080p for the PPI (Pixel Per Inch) value to not drop below 100.
- If all still fails, well maybe it’s just the time for you to get a better hardware if you cannot wait for future patches to fix the game.
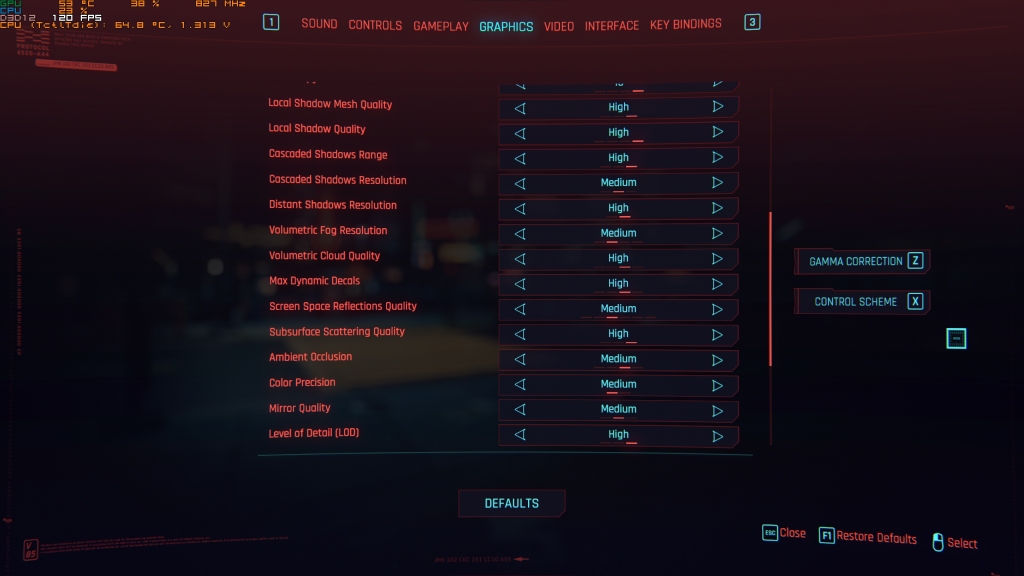
So here are my final settings:

TLDR:
If you’re using mid-range GPU along the lines of 5700XT or 5700, with a decent 6-core Ryzen CPU, do these steps:
1.) If you are GPU-bound: Turn ALL toggable settings to On and slider settings to High
If you are CPU-bound, instead go to step 3
2.) If you are GPU-bound: Turn to Medium ONLY these settings:
- Cascaded Shadows Resolution
- Volumetric Fog Resolution
- Screen Space Reflections Quality
- Ambient Occlusion
- Color Precision
- Mirror Quality
- Optional: Local Shadow Quality, Volumetric Cloud Quality
3.) If you are CPU-bound, apply the hex edit fix and adjust these settings ONLY:
- Cascaded shadow range
- Distant shadow resolution
- Max dynamic decals
- Level of Detail
- Crowd Density
4.) If you are not Sapphire GPU owners: Use 80 to 95 percent resolution slider at the very bottom or just utilize dynamic resolution and set your target framerate. If you have Sapphire GPUs, use TriXX software to enable 85 percent resolution for your chosen native resolution and select it in-game instead of the the AMD FidelityFX slider.
That’s all for me, I hope this helps a lot especially those mid range users out there who think they need to grab a 3080 or 3090 just to run the game. Be aware that current pricing for these cards are crazy way beyond the MSRP. Please comment down below if I missed or misinterpreted anything. I am not a graphics expert of any kind; just some nerd who like to dig deep into the details of stuff.
Did my guide help you in any way? I will be trying my best to respond to each and every comment coming from you.
Thank you again and stay safe!

You should probably credit Eurogamer/digital foundry.
LikeLiked by 1 person
Sadly I still haven’t finished watching their video so I really don’t know what to credit. haha.
LikeLike
Good read. Thank you. Running Ryzen 3600, 32 gig ram cl14 3200, asus b550-f strict mobo, rx 580 8gb on acer 165hz 1080p monitor. Did a lot of tweaks myself but this article answered a lot of random questions I had. Damn good game, once they iron out a few things, it will be glorious. I am on act 2, riders on the storm.
LikeLiked by 1 person
glad you’re playing it! ironically, i haven’t played this game properly yet.
LikeLike
Excellent article. The WHY is SO important. Cleared up a couple confusing issues for me. It’d be nice if games had a feature that could show you how many fps you stand to gain/lose by adjusting individual settings. Until then . . .
LikeLiked by 1 person
thanks a lot man! that feature would be sure handy but considering different hardware configurations also respond differently to graphical settings changes, I think it’s improbable to be implemented for now.
but i do think they’re stepping in the right direction in that image comparisons are now being included in some of the games – especially in ubisoft’s games.
LikeLike
Thanks for the showing how it is best played at Amd. I just build a desktop with a 3700x so i’ll be playing at lesser specs, but i don’t mind. With this guide i can tweak it alot beter.
LikeLiked by 1 person
Sure thing man. Let me know of your results. I am glad to be of help.
LikeLike
Thanks for the in depth settings guide. My current rig is
R5 3600
16gb of 3200mhz cl16
Rx 5600 xt 6gb
Im using my current settings combination, and achieve mostly 60+fps, with some dips to 55 and the occasional drop to 46 (very rarely).
I use the config file edit but haven’t tried the hex edit.
But I’m gonna try your settings first. Hopefully in can give me a more stable 60fps at 1080p.
LikeLiked by 1 person
Yes. I would also recommend figuring out the graphics settings first before doing other external editing of the game files.
LikeLike
Great guide for this game. Very knowledgeable and detailed! Keep up the good work!
LikeLiked by 1 person
Thank you very much!
LikeLike
Damn, that’s what I like to find on the internet!
I’m really greatfull for all the hard work and time you put into this artcile!
It’s really top notch quality content and I’m saving it for later, when I have some free coins to put into my PCMR machine ;D
LikeLiked by 1 person
Glad to be of help man. Remember to contact me anytime if you need help!
LikeLiked by 1 person